Botanical Line Painting: Simple Stems and Leaves
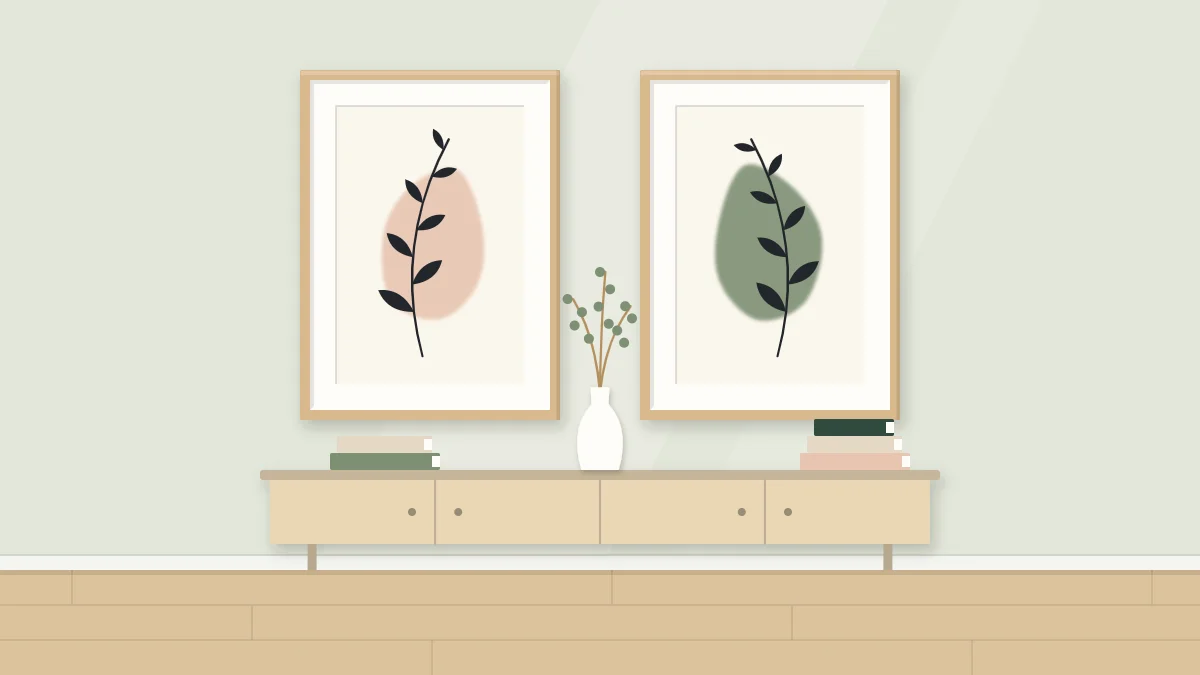
Paint a soft color shape, then add a single-line stem and press-and-lift leaves with one round brush. Includes the practice drill and how to make a matching pair.
Tutorial at a glance
Materials
- Heavy paper, 200 to 300 gsm
- Round brush, size 6 or 8
- Acrylic or gouache paint in 2 colors
- Scrap paper for practice
- Water jar and palette plate
- Paper towel
Botanical line painting sounds like it needs a steady drawing hand, but the method here needs only one round brush and one stroke that you repeat. A soft patch of color goes down first. A single stem line and a row of press-and-lift leaves go on top. The loose shape underneath hides small wobbles and makes the lines look deliberate.
You are not painting a particular plant. You are inventing a stem with its own curve and its own leaf rhythm, which is why two paintings made the same afternoon never match exactly and still look like a pair.
Materials for one painting
- Heavy paper, 200 to 300 gsm, so it stays reasonably flat when wet. Watercolor or mixed-media paper both work.
- One round brush with a good point, around size 6 or 8.
- Acrylic or gouache paint: one soft color for the background shape and one dark color for the lines.
- A jar of water, a plate for a palette, and paper towel.
- Scrap paper of the same kind for practice.
The example is painted on 8 x 10 in (20 x 25 cm) paper. Tape the sheet to a board along all four edges if you want a clean border and less curling.
Load the brush properly
Most problems with line work come from the paint, not the hand. Thin the dark color with a little water until it flows like cream: thick enough to stay opaque, loose enough to leave the brush without dragging.
Dip the brush to about two-thirds of the bristle length, then roll the tip on the plate to bring it back to a point. Wipe one side lightly on the rim. A brush that is overloaded drops a blob at the start of every stroke, and a brush that is too dry gives a scratchy, broken line.
Practice the leaf stroke on scrap
The whole leaf is one movement with three parts:
- Touch. Set only the tip of the brush on the paper. This is the thin point where the leaf joins the stem.
- Press. As you pull the brush toward you, press down so the bristles spread. The belly of the brush makes the wide middle of the leaf.
- Lift. Keep pulling and ease the pressure off until only the tip is touching, then leave the paper. That is the leaf’s point.
Fill a scrap sheet with rows of them. Make the first row with barely any pressure, so the leaves are slim, and add pressure with each row until they are as wide as the brush allows. Turn the paper as you go so that you are always pulling the stroke toward yourself, which is easier than pushing.

Practice stems on the same sheet. Hold the brush upright, farther back on the handle than feels natural, and draw a long curve using your whole arm rather than your wrist. Move at a steady pace. A line drawn slowly shows every tremor, and a line drawn in one confident sweep rarely does.
Tip
Stop practicing when ten leaves in a row look related to each other. They do not need to be identical. Slight variation is what makes the stem look natural.
Paint the soft color shape
On your good paper, mix the background color with more water than you used for the lines, so it is slightly translucent. Paint one rounded shape: a loose oval, a pebble, a lopsided arch. Keep it off center and let it cover roughly a third to a half of the page.
Work quickly and do not tidy the edge. Uneven edges and visible brush marks are part of the look. Let the shape dry fully before adding lines. Drying time varies with the paint and how much water you used, so check the label and touch a corner of the shape to test it. Lines painted onto a damp shape will feather.
If loose, unplanned shapes are new to you, abstract painting for beginners has exercises that make them easier to trust.
Add the stem and leaves
Decide where the stem will start and finish before the brush touches the paper. A stem that begins near the bottom edge, crosses the color shape and ends in open paper ties the two layers together.
- Paint the stem in one stroke from the base upward, letting it thin out at the top.
- Add leaves from the bottom up, starting each one with the brush tip on the stem.
- Alternate sides, or place leaves in pairs. Choose one pattern per stem.
- Make the leaves smaller toward the tip by pressing less.
- Reload the brush every two or three leaves so the color stays even.

Leave some leaves overlapping the edge of the color shape and some sitting on bare paper. That overlap is what gives the piece depth.
Composing one to three stems
One stem is the calmest option and suits a small sheet. If you add more, give each one a different job.
| Stems | Arrangement | Effect |
|---|---|---|
| One | A single curve leaning to one side | Quiet, lots of open paper |
| Two | One tall, one about half its height | Balanced without being symmetrical |
| Three | Tall, medium and short, fanning from one point | Fuller, like a small sprig |
Keep the stems from crossing more than once, and vary the leaf shape between them: slim leaves on one, rounder leaves on another. Resist filling the page. Open space around the stems matters as much as the lines.
Making a matching pair
Two paintings look related when they share ingredients, not when they repeat each other. Mix enough of both colors for two sheets before you start, because a second batch rarely matches.
- Use the same two colors and the same paper size.
- Put the color shape low and left on one sheet, high and right on the other.
- Curve the stems toward each other so the pair faces inward when hung side by side.
- Use the same leaf pattern on both, or swap it on purpose.
Paint both background shapes in one session, then both sets of lines, so your hand keeps the same rhythm across the pair.
Framing and next steps
Once the paint is dry, press the sheet under a few heavy books overnight if it has curled. A simple frame with a mat suits these paintings, and framed craft wall art explains how to mount paper work so it sits flat behind glass.
For a crisper, more graphic take on leaf shapes, the same subject works well in cut paper. See botanical paper cut wall art for that version.
Frequently asked questions
What brush is best for painting simple leaves?
A round brush that comes to a fine point when wet is the most useful. A medium size, around 6 or 8, makes thin stems with the tip and wide leaves with the belly, so you can complete a whole painting without changing brushes.
Why do my painted stems look shaky?
Shaky lines usually come from moving too slowly, gripping the brush near the bristles, or paint that is too thick to flow. Thin the paint slightly, hold the handle farther back, and draw the curve in one steady sweep from the shoulder.
Can I use watercolor instead of acrylic for this project?
Yes. Watercolor gives a softer, more transparent background shape. Let it dry completely before adding lines, and use a strongly mixed dark color for the stem so it stays visible on top. The leaf stroke itself is the same with any water-based paint.