Abstract Painting for Beginners: A First Canvas Step by Step
Paint a first abstract canvas in acrylic with three colors and white: tone the ground, block in three large shapes, adjust the edges, add a few marks and stop. Includes what to do when the color turns muddy.

Tutorial at a glance
Materials
- Acrylic paint in 3 colors plus white
- Stretched canvas, 16 x 20 in (40 x 50 cm)
- Wide flat brush, 2 in (50 mm)
- Small flat or round brush
- Palette or old plate
- Water jar and rag
Abstract painting for beginners goes best with a plan that is short enough to remember while the paint is wet. This one has four stages and a firm ending: tone the canvas, block in three large shapes, adjust their edges with a second layer, add a few marks, then stop.
There is no subject to get right and no reference to match. The composition is your own from the first brushstroke. What the steps give you is an order of work, big to small, that keeps a first canvas from turning busy or muddy.
Set up a limited palette
Acrylic paint suits a first abstract because it dries quickly, cleans up with water while wet, and can be painted over once dry. Limit yourself to three colors plus white. Fewer colors means every mixture on the canvas is related to the others.
A dependable set is one warm color, one cool color and one dark or earthy neutral, for example a muted terracotta, a soft blue-green and a deep umber. If you want help choosing, the guide to picking a color palette for wall art covers combinations that sit well together.
Squeeze the three colors and a larger amount of white around the edge of a palette or an old plate. In the middle, mix a tint of each color with white, and one or two blends between neighbors. Those in-between mixtures are what you will use most.
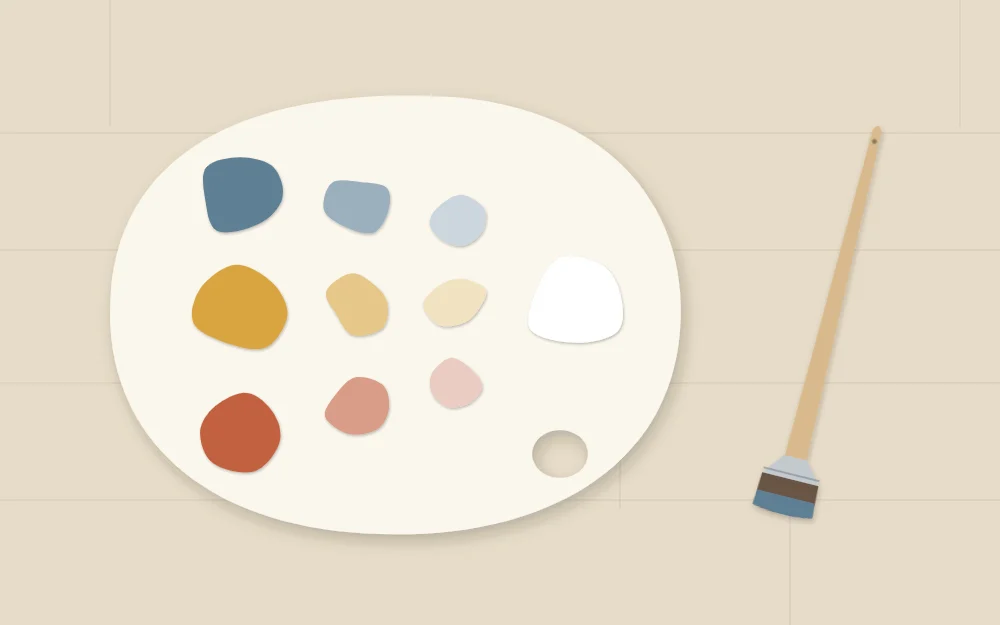
For tools, you need a wide flat brush of about 2 in (50 mm), a smaller flat or round brush, a jar of water and a rag. The example canvas is 16 x 20 in (40 x 50 cm), large enough to move your whole arm.
Tone the ground
A bright white canvas makes every color look harsh and leaves white specks wherever the brush skips. A toned ground fixes both.
Mix white with a small touch of one of your colors and thin it slightly with water. Brush it over the entire canvas, including the sides, in loose crisscross strokes. It does not need to be even; a little variation is useful later. Let it dry until it no longer feels cool to the touch, and check the label for the drying time.
Block in three large shapes
Now work with the widest brush only. Paint three big, loose shapes, one in each color family, using your tints more than the pure colors.
- Paint the largest shape first. Let it take up roughly a third of the canvas and sit off center.
- Add a medium shape in a second color so it touches or overlaps the first.
- Add the smallest of the three in the remaining color, somewhere that balances the other two.
- Leave a good portion of the toned ground showing.
Keep the shapes simple: a rounded mass, a broad leaning block, a wide band. Hold the brush near the end of its handle and move from your shoulder. Soft, uneven edges are what you want at this stage. For more on placing shapes, see wall art composition basics.
Step back, then adjust the edges
Lean the canvas against a wall and walk to the other side of the room. From there you see the composition; up close you see only brushstrokes. Step back every few minutes for the rest of the painting.
Let the first layer dry to the touch, then work a second layer with the same wide brush:
- Reshape with the ground color. Paint back into a shape from the outside to make it smaller or to change its outline.
- Sharpen one or two edges and leave the others soft. Contrast between crisp and blurred edges adds depth.
- Shift a tone. Brush a lighter or darker version of a color over part of its shape, letting some of the first layer show through.
- Thin the paint with a little water where you want the layer below to glow through.

Add a few lines or marks
Only now switch to the small brush. The last layer is a handful of accents that give the eye something fine to find among the broad areas.
Choose two or three of these, not all of them:
- One or two thin lines in your darkest color, crossing from one shape into another
- A short row of dashes or dots near an edge
- A small patch of your strongest pure color
- A line scratched into wet paint with the brush handle to reveal the layer beneath
Place the marks near the main shape, not spread evenly over the canvas. Then put the brush down.
Know when to stop
Overworking is the most common way a first abstract goes wrong. Use these checks:
- You can name the big, medium and small shapes at a glance from across the room.
- There is still quiet, open ground somewhere.
- The next change you are considering is a small fix, not something the painting needs.
If all three are true, the painting is finished. Leave it overnight before deciding on any further changes.
Tip
Turn the canvas a quarter turn and look again. Abstracts often read better in an orientation you did not plan.
What to do when it looks muddy
Mud is dull gray-brown color, and it has a few predictable causes: blending wet paint into wet paint for too long, mixing all three colors together, or painting with a brush that still carries the last color.
- Stop and let it dry. Acrylic can be painted over. Most muddy passages are fixed by waiting, not by more brushing.
- Repaint with a clean mixture. Once dry, cover the dull area with a fresh tint or with the ground color.
- Rinse and wipe. Clean the brush between color families and change the water when it turns opaque.
- Mix on the palette. Lay color down in a few strokes and leave it, instead of stirring it on the canvas.
Finish and next steps
Paint the canvas sides in the ground color or carry the shapes around them, so the piece looks complete unframed. Let it dry fully before handling; check the paint label for timing.
When you hang it, weigh the canvas, identify the wall material, and choose hardware its manufacturer rates for that weight and wall type, following the package instructions.
Once flat color feels comfortable, textured canvas art adds raised surfaces with paste and a palette knife.
Frequently asked questions
How many colors should a beginner use for an abstract painting?
Three colors plus white is a comfortable limit. It gives you enough range for light, mid and dark areas, and because every mixture comes from the same few tubes, the colors relate to one another. You can add a fourth color on a later canvas once mixing feels familiar.
Do I need to sketch an abstract painting first?
It is optional. A few small pencil thumbnails on scrap paper can help you decide where the largest shape goes, but you do not need to draw on the canvas. Blocking in big shapes directly with a wide brush keeps the painting loose, and acrylic lets you repaint anything.
How do I know when an abstract painting is finished?
Step back across the room. If the main shapes read clearly, some quiet space remains, and the only changes you can think of are small tweaks, it is done. Leaving the canvas overnight and looking again with fresh eyes is the most reliable test before adding anything.