Fall Leaf Wall Art With Paper Leaf Shapes
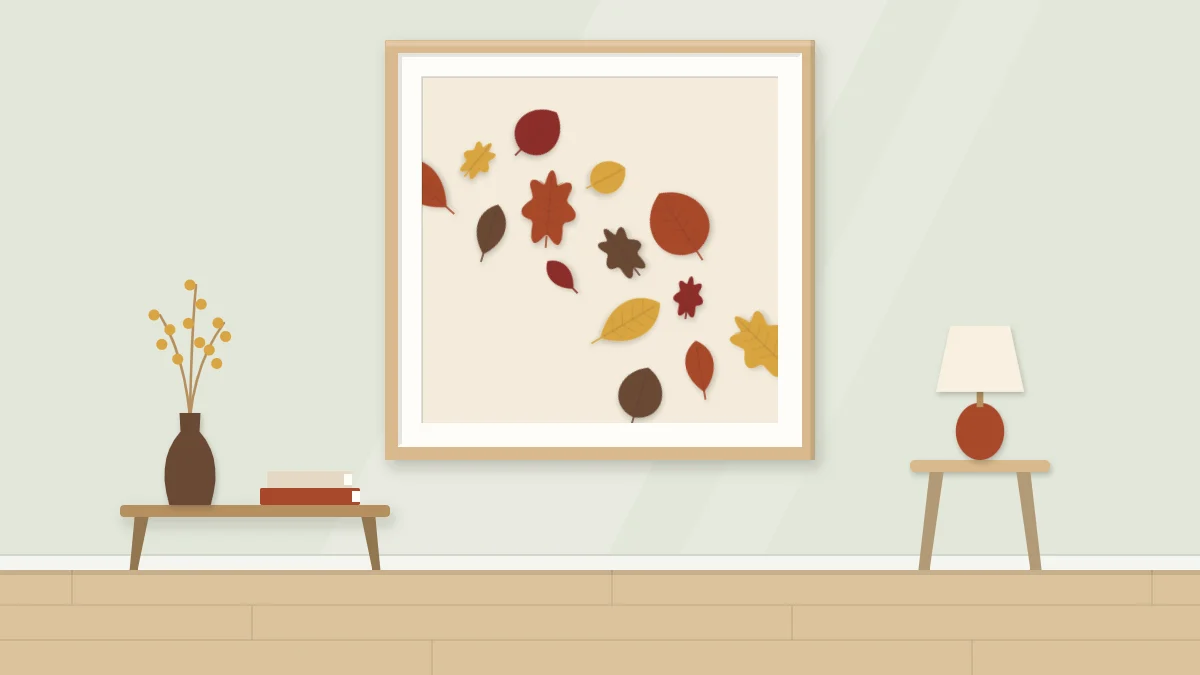
Cut paper leaves in four warm tones, score a center vein so each one lifts, and glue them at a single point in a loose diagonal drift across a cream background.
Tutorial at a glance
Materials
- Cream background paper, about 300 gsm
- Leaf paper in four warm tones, 120 to 160 gsm
- Thin card for templates
- Small sharp scissors
- Scoring tool and ruler
- PVA glue and a toothpick
A handful of paper leaves, creased down the middle and glued at one point, catches light in a way a flat print cannot. This piece of fall leaf wall art uses that small trick: each leaf lifts slightly from the background, so the whole drift throws soft shadows that shift through the day.
Everything here is paper. You paint or choose four warm tones, cut three leaf shapes in three sizes, and arrange them in a loose diagonal, as if they were falling from one corner to the other.
What you need
- Background sheet in cream or off-white, about 300 gsm. The example is 11 x 14 in (28 x 36 cm).
- Paper for the leaves, 120 to 160 gsm: either colored paper in four tones, or white paper and acrylic or gouache paint.
- Thin card for templates, such as an empty cereal box.
- Pencil, small sharp scissors and a ruler.
- A scoring tool: a bone folder, an empty ballpoint pen or the back of a butter knife.
- PVA glue or a glue stick, and a toothpick for applying it.
- Optional: a craft knife and cutting mat for inner notches.
Build a palette of four related tones
Four tones are enough to look rich without becoming busy. A dependable set is rust, ochre, deep red and brown: two mid tones, one bright and one dark.
If you are using colored paper, lay the sheets on the background and squint. They should look like relatives. Swap out any sheet that looks cooler or much brighter than the rest.
If you are painting your own, mix the colors from a shared base so they stay related. Start with an orange, then:
- add a little red and a touch of brown for rust,
- add yellow and a small amount of brown for ochre,
- mix red with a little brown for deep red,
- use the brown alone, slightly warmed with orange.
Brush each color over a half sheet in loose, uneven strokes. The streaks become natural variation once the leaves are cut. Let the sheets dry flat; drying time is approximate and depends on the paint, so check the label.
Draw three leaf shapes in three sizes
Sketch your own shapes; simple outlines read better than detailed ones at this size. Three that contrast well:
- A pointed oval, widest in the middle, like a simple almond.
- A lobed leaf with three to five rounded bumps along each side.
- A slender leaf, long and narrow, with a slight curve.
Draw each shape in three lengths: about 3 in (7.5 cm), 2.25 in (6 cm) and 1.5 in (4 cm). Folding the card in half and cutting half a leaf along the fold gives a symmetrical template; for the curved slender leaf, draw it freehand.

For more on drawing and cutting plant shapes, including stems and layered foliage, see the guide to botanical paper cut wall art.
Cut the leaves
Trace the templates on the back of your papers and cut out about 24 leaves. A workable mix is 6 large, 8 medium and 10 small, spread across the four tones, with fewer of the darkest tone so it acts as an accent.
Cut with long strokes and turn the paper, not the scissors, around the curves. Small differences between leaves are welcome. If you add notches with a craft knife, work on a cutting mat and cut away from your hand.
Score a center vein so the leaves lift
Scoring presses a line into the paper so it folds cleanly without cracking.
- Place a leaf face up on a slightly soft surface, such as a magazine.
- Lay the ruler from the stem end to the tip. For curved leaves, score freehand along the curve.
- Draw the scoring tool firmly along the line once. You want a groove, not a cut.
- Pinch the leaf along the groove so the sides rise into a shallow V, then let it relax.
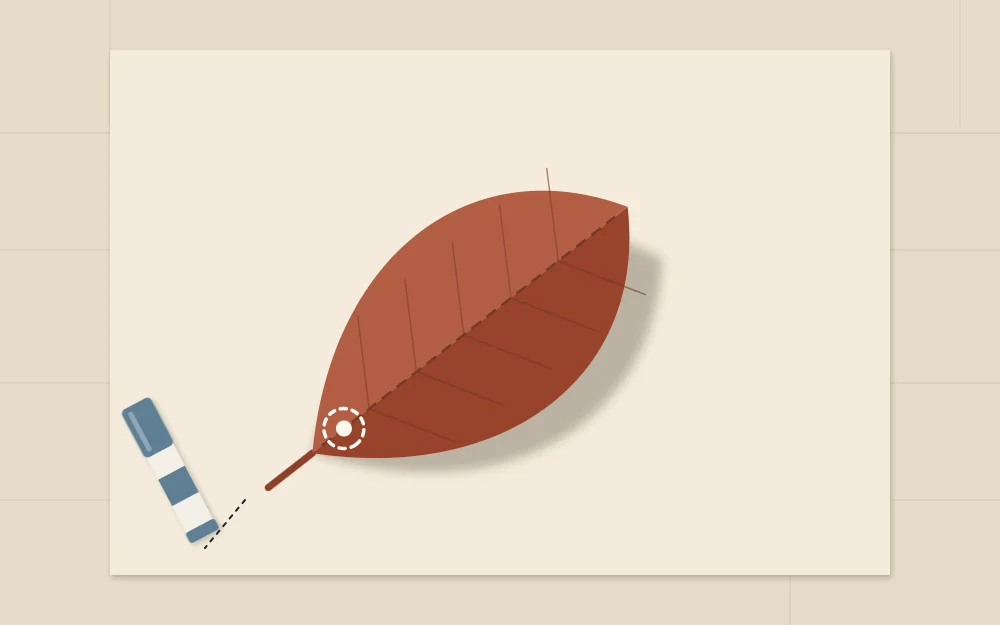
Vary the fold. Some leaves can be pinched sharply and others barely creased, and a few can be folded the opposite way so they arch upward. The mix keeps the drift from looking mechanical.
Tip
Test your scoring pressure on a spare leaf first. Thin paper tears under a hard tool, and thick paper needs a second pass along the same groove.
Arrange a loose diagonal drift
Mark a faint pencil line on the background from the upper left corner area to the lower right. This is a guide for direction, and the leaves will wander on both sides of it.
- Place the large leaves first, spaced unevenly along the diagonal.
- Add medium leaves around them, some overlapping a large leaf slightly.
- Scatter the small leaves last, with two or three well away from the main band, as if they had been carried off.
- Turn every leaf to a different angle. Tips pointing in the same direction make the drift look like a pattern.
Keep the drift denser at one end and sparser at the other, and leave two corners of the background empty. That open space is what makes the leaves look as if they are moving. Distribute the four tones so no color clumps.
Take a picture of the arrangement before you move anything. If you enjoy composing with loose paper shapes like this, torn paper landscape art uses a similar approach with torn edges.
Glue each leaf at one point
Lift one leaf at a time, starting with those that sit underneath others. Put a small dot of glue on the back near the stem end, on one side of the crease, and press that spot for a few seconds. Leave the rest of the leaf free.
A toothpick keeps the dot small. Too much glue flattens the leaf and can leave a shiny mark on the background. Once everything is in place, erase the guide line and let the piece dry flat; check the glue’s label for timing.
Frame and display
Lifted leaves need room. A shadow box or a deep frame with a spacer keeps the glazing off the paper; pressing them under glass in a standard frame flattens the effect. An open frame without glazing also works, though the paper will collect dust.
Keep the piece out of direct sun, since colored papers and paints can fade over time. If you rotate work through the year, this design fits the fall slot in a seasonal wall art swap system, and the same templates in greens make a spring version.
Frequently asked questions
What paper works best for paper leaves?
Paper around 120 to 160 gsm is a good range. It is thin enough to cut and score easily, and stiff enough to hold a crease so the leaf stays lifted. Very thin paper tends to droop, and heavy card is hard to fold into a soft V shape.
Can I use real leaves instead of paper ones?
This project is designed for paper leaves only. Real leaves change color, curl and become brittle as they dry, and they behave unpredictably in a frame. You can still collect real leaves as drawing references and trace their outlines to make your own paper templates.
How do I stop the leaves from looking too evenly spaced?
Place the largest leaves first at uneven intervals, cluster some so they overlap, and leave clear gaps elsewhere. Turn every leaf to a different angle and let two or three small ones sit away from the main band. An empty corner or two helps the drift look natural.