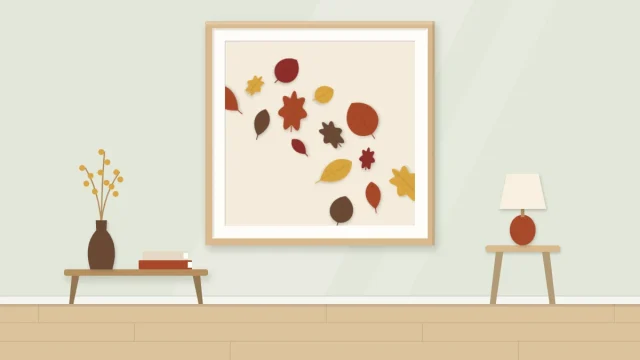
Seasonal Wall Art: A Swap System for One Set of Frames
Keep one set of frames on the wall all year and rotate four small sets of same-size inserts through them. Covers palettes, simple motifs, labeling and flat storage.

Seasonal wall art usually means a box of decorations that comes out, goes up with fresh holes or tape, and gets packed away again. A swap system is calmer. The frames stay on the wall all year, in the same places, and only the artwork inside them changes.
The idea rests on one decision: every insert you make is the same size. Once that is fixed, a change of season takes ten minutes, needs no tools at the wall, and the pieces you are not showing store flat in a single folder.
Fix the frames and the hanging points
Choose a small set of identical frames and hang them once. Three in a row is the easiest arrangement to live with; a pair or a grid of four works too. If the frames are joining a larger group, plan their positions with the template method in how to arrange a gallery wall.
Because the frames are permanent, it is worth hanging them carefully. Weigh a frame with its glazing and backing, identify your wall material, and use hardware its manufacturer rates for that weight and wall type, following the package instructions. If you rent or are unsure about the wall, ask the landlord or a professional first.
Pick frames that open easily from the back. Flexible tabs or turn buttons survive repeated opening far better than stapled or taped backs. Plain frames in wood, white or black suit every season, so the artwork does the changing.
Set one standard insert size
Measure the frame’s rebate, the recess the artwork sits in, and cut one master template from stiff card to fit it. Every insert from now on is traced from that card.
If the frames have mats, also mark the window opening on the template. Anything outside the window will be hidden, so keep your design inside it with a small margin. For frames 8 x 10 in (20 x 25 cm) with a mat, the visible area is often about 5 x 7 in (13 x 18 cm), but measure your own.
Use the same paper for every insert, something around 200 to 300 gsm that stays flat in the frame. The guide to framed craft wall art covers mats, backing and keeping work flat under glazing.
Tip
Cut a stack of blank inserts in one session and keep them in the storage folder. An idea is easier to act on when the paper is already the right size.
Plan four small sets
With three frames, a full year is twelve small pieces: four sets of three. Each set should look like a family, and the four sets should look related to each other, so the wall feels consistent as it changes.

The simplest way to get there is to hold some things constant and vary only two: palette and motif.
| Season | Palette shift | Simple motif |
|---|---|---|
| Spring | Light greens, soft pink, pale yellow | Buds, short stems, small ovals |
| Summer | Clear blue, coral, bright yellow | Sun shapes, half circles, wavy bands |
| Fall | Rust, ochre, deep red, brown | Leaf shapes, falling diagonals |
| Winter | Deep blue, gray, white, one warm accent | Snow dots, bare branches, stars from triangles |
These are suggestions. Your seasons may look different from this list, and your own sketches of what you see outside will be more personal than any standard motif.
Keep a common thread across the year
Sets that share nothing make the wall feel like four unrelated displays. Choose two or three constants and keep them for all twelve pieces.
- One background. The same cream, white or kraft paper behind every design.
- One technique. All cut paper, all painted shapes, or all stamped, rather than a different method each season.
- One layout. For instance, a single large motif in the center frame and scattered small ones at the sides.
- One recurring color. A neutral such as charcoal or warm gray that appears in every set.
Within a set of three, vary scale. One large shape, one medium group and one scatter of small shapes reads better than the same motif three times.
Make the sets in short sessions
There is no need to make all twelve at once. Make the coming season’s set a couple of weeks ahead and let the collection build over a year.
- Sketch three thumbnails side by side so you see the set as a row.
- Mix or choose the palette, and test it on a scrap of the background paper.
- Trace three inserts from the master template and mark the visible window lightly in pencil.
- Make all three together, moving between them, so the colors and shapes stay consistent.
- Let everything dry flat before framing; drying times vary, so check the label on your paint or glue.
Flat or low-relief work suits this system best. A project with lifted paper, such as fall leaf wall art with paper leaf shapes, can still fit if the frame has enough depth between glazing and backing, or if you make a flatter version for the swap frames.
Label the backs
Write on the back of each insert in soft pencil, pressing lightly so nothing embosses through: the season, the position in the row (left, center, right) and an arrow pointing up. Abstract pieces are easy to hang upside down six months later.
Add the year if you like. Sets from different years can be mixed later, and the dates turn the folder into a record of what you made.
Store the off-season sets flat
Inserts all the same size stack neatly, which is the quiet advantage of the whole system.
- Use a rigid folder, a shallow box or two sheets of stiff card slightly larger than the inserts.
- Put a plain sheet of paper between every insert so surfaces do not rub or stick. Acid-free tissue or plain white paper are common choices.
- Keep each set together with a paper band or a labeled divider.
- Store the folder flat, somewhere dry and away from direct sun and heat sources.

Make sure pieces are fully dry before they go in. On swap day, lift each frame down, open the back, change the insert, wipe the inside of the glazing with a dry cloth and return the frame to its place.
Frequently asked questions
How many frames do I need for a seasonal swap system?
Three identical frames in a row is an easy place to start, which means twelve small inserts for a full year. Two frames or a grid of four work as well. What matters is that the frames match and every insert is cut to the same size.
How do I store artwork inserts between seasons?
Stack them flat in a rigid folder or shallow box with a plain sheet of paper between each one, keep each set together with a labeled band, and store the folder somewhere dry and out of direct sun. Check that paint and glue are fully dry before stacking.
Do the four seasonal sets need to match each other?
They do not need to match, but they look better related. Keep two or three things constant, such as the background paper, the technique and the layout, and change only the palette and the motif. The wall then feels familiar while still marking the season.