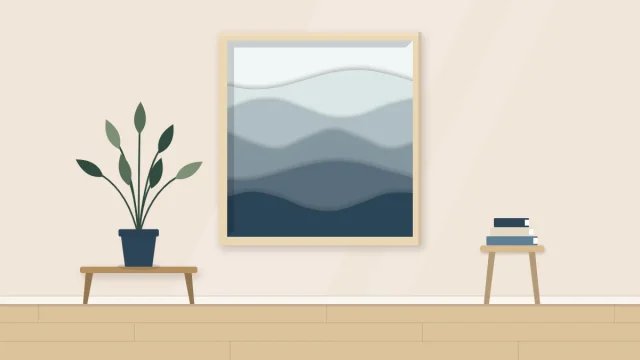
Torn Paper Landscape Art for a Soft, Layered Look
Tear bands of paper into sky, hills and foreground, then overlap them from back to front for an imagined landscape. Includes how to control a white or colored torn edge and how to grade tones from pale to dark.

Tutorial at a glance
Materials
- Heavy base paper, 250 to 300 gsm
- Paper in 5 graded tones, 120 to 200 gsm
- Small piece of warm-colored paper for the sun
- Glue stick or PVA glue
- Craft knife, ruler and cutting mat
- Baking parchment and heavy books
A torn edge does something scissors cannot: it leaves a soft, slightly ragged line that looks like a distant ridge in haze. Torn paper landscape art is built entirely from that effect, with bands of paper overlapping from the sky down to the foreground.
The scene here is imagined, not taken from a real place. You decide how many hills there are, how steep they run and where the sun sits. Because every tear is a little unpredictable, the result is always your own.
Choose paper that tears well
Not all paper tears the same way. Before starting, test a corner of each sheet.
- Solid-core colored paper is dyed all the way through, so the torn edge is the same color as the face.
- White-core paper is colored on the surface only. Tearing exposes a rough white border, which is the classic torn-paper look.
- Hand-painted paper gives you the white core for free. Brush acrylic or watercolor over white drawing paper of about 120 to 160 gsm and let it dry; check the label for the drying time.
Papers in the range of about 120 to 200 gsm are easiest to control. Very thin paper tears too fast, and heavy card resists and splits in layers. For the base, use a sturdier sheet of around 250 to 300 gsm so it stays flat under the glue.
Tear toward you or away from you
The direction of the tear decides which kind of edge you get. This applies to white-core and painted papers.
Hold the sheet face up with one hand on each side of where the tear will run. One hand stays still and the other pulls.
- Pull the moving hand toward you and the white core shows on the piece that stays in your still hand. That piece gets a rough white border.
- Pull the moving hand away from you and the tear undercuts the surface instead. The same piece now has a clean colored edge with the white hidden underneath.
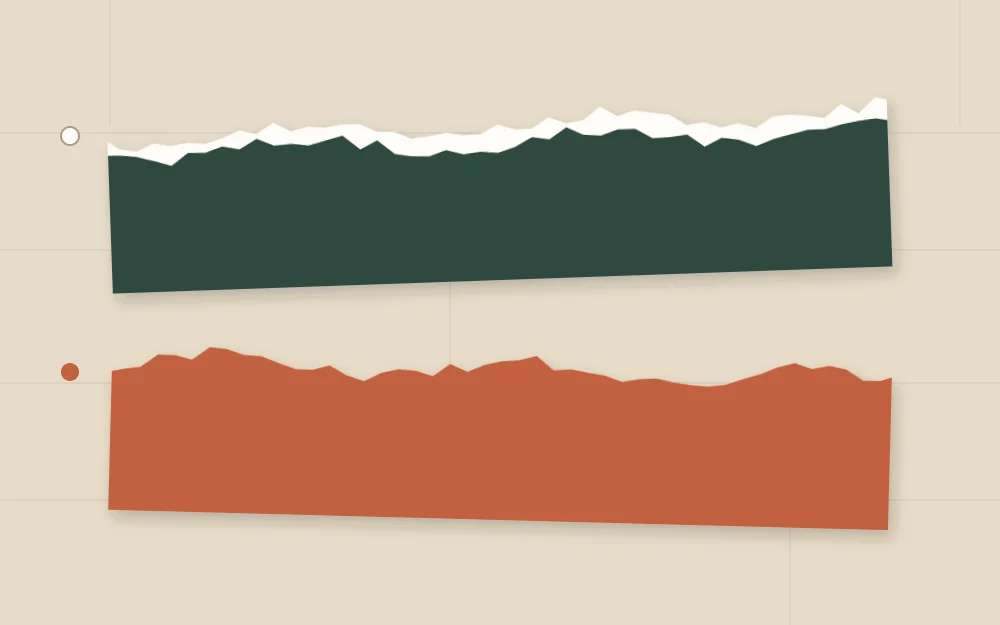
Practice both on a spare strip until you can predict the result. White edges read like mist or snow lines between ridges; colored edges are quieter and suit the darkest foreground band.
Tip
Tear slowly, a thumb-width at a time, with your fingers close to the tear line. For a gentler curve, run a damp brush along the line first and the paper will follow it.
Grade the color from pale to dark
Distance in a landscape comes from tone. Far things look paler and cooler; near things look darker and stronger. Arrange your papers in that order before tearing anything:
| Band | Tone | Edge to try |
|---|---|---|
| Sky | Palest | None, full sheet |
| Far hills | Light | White |
| Middle hills | Medium | White |
| Near hills | Medium-dark | White or colored |
| Foreground | Darkest | Colored |
One hue in five steps is the simplest route: five blues, or five greens. A drift between two neighbors, such as blue-gray in the distance warming to deep green at the front, adds interest without getting complicated. The guide to building a color palette for wall art explains how to pick tones that step evenly.
Tear the bands
- Cut the base sheet to size. The example is 8 x 10 in (20 x 25 cm), landscape or portrait.
- Cut or tear the sky paper to cover roughly the top two-thirds of the base.
- For each hill band, start with a strip the full width of the base and a little taller than the band needs to be.
- Tear along the top edge only, in a slow rolling line. Give each band a different profile: one long slope, one with a single peak, one with two low rises.
- Leave the bottom and side edges straight. They will be covered or trimmed.
- Tear a small circle for the sun, turning the paper as you go. It does not need to be perfectly round.
If a tear wanders off course, keep going. An unexpected dip usually looks more natural than a planned one, and you can always tear a second strip.
Build from back to front
Lay everything out dry first. Each band overlaps the one behind it by at least 3/8 in (1 cm), so no base paper shows through, and each ridge line stays visible above the next.
- Sky and sun. Glue the sky flush with the top of the base. Place the sun off center, low enough that the far hills can overlap its lower edge if you want a rising or setting sun.
- Far hills. Glue the palest hill band so its ridge crosses the lower part of the sky.
- Middle and near hills. Add each band a little lower than the last. Shift the peaks left and right so they do not stack directly above one another.
- Foreground. Finish with the darkest band along the bottom edge.

Glue without flattening the edge
Use a glue stick or a thin coat of PVA glue. Apply it to the back of each band, working from the center outward on a sheet of scrap paper, then smooth the band onto the base with clean fingers.
You have a choice at the torn edge. Glue it right to the tip for a flat, graphic finish, or stop the glue about 1/8 in (3 mm) short so the feathered edge lifts slightly and casts a faint shadow. The second option adds a little depth; for much more, the spacer method in layered paper wall art raises each band off the one behind.
When all the bands are down, turn the piece over and trim any overhang flush with the base, using a ruler and craft knife on a cutting mat and cutting away from your hand. Cover the front with baking parchment and press it under a few large books until the glue is dry.
Frame and display
A white or cream mat echoes the white torn edges and gives the scene room. If you left the edges lifted, make sure the mat or a spacer keeps the glass from pressing them down; framing craft wall art covers how to do that.
For hanging, weigh the framed piece, check what your wall is made of, and choose hardware that its manufacturer rates for that weight and wall type. Follow the package instructions.
Frequently asked questions
How do I get a white edge when tearing paper?
Use paper that is colored on the surface but white inside, or white paper you have painted yourself. Hold it face up and pull one hand toward you while the other stays still. The piece in your still hand keeps a rough white border. Test on a spare strip first.
What kind of paper is best for torn paper art?
Medium papers of roughly 120 to 200 gsm give the most control. Painted drawing paper, watercolor paper offcuts and white-core craft paper all tear with a soft, fibrous edge. Very thin paper rips too quickly to steer, and thick card tends to split into layers instead of tearing cleanly.
How many layers should a torn paper landscape have?
Four or five bands, including the sky, are enough for a clear sense of distance at a small size. Fewer can look flat, while many more leave each ridge too thin to read. On a larger sheet you can add bands, as long as each step in tone stays visible.