How to Stretch Fabric Over a Canvas for Instant Wall Art
Wrap patterned or textured fabric around a stretched canvas: how much overlap to allow, the center-outward stapling order, neat corner folds, and keeping the pattern straight.
Tutorial at a glance
Materials
- Stretched canvas or stretcher frame
- Medium-weight woven fabric
- Staple gun and 1/4 in (6 mm) staples
- Iron
- Fabric scissors
- Tape measure
- Paper tape or kraft paper for the back
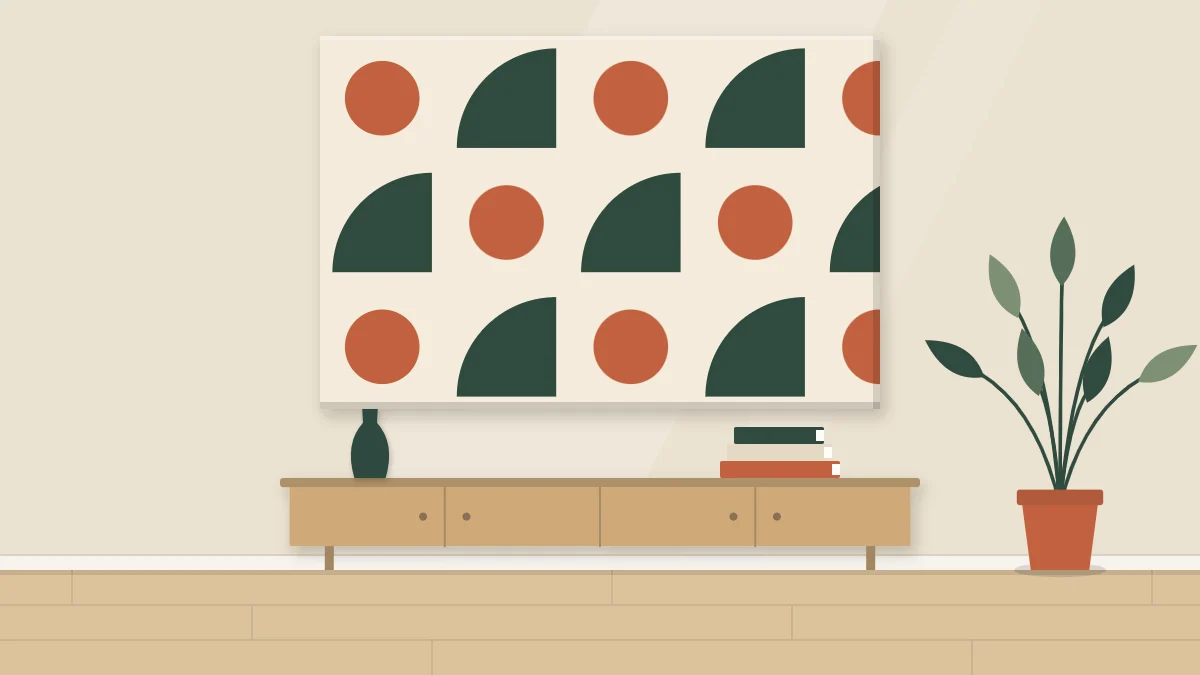
Fabric covered canvas wall art is about the fastest route from bare wall to large finished piece. You wrap a length of patterned or textured fabric around a stretched canvas or a plain wooden frame, staple it at the back, and hang it. The fabric does the designing; your job is to mount it straight and tight.
That job is mostly a matter of order. Staple from the center of each side outward, fold the corners the same way every time, and keep checking the front as you go.
What you need
- A stretched canvas or a wooden stretcher frame
- Woven fabric, large enough to wrap around to the back on all four sides
- Staple gun with short staples, about 1/4 in (6 mm)
- Iron, fabric scissors, tape measure and pins or chalk
- A flat screwdriver or staple remover for corrections
A ready-stretched canvas is the simplest base, because its own surface sits behind your fabric and stops light showing through. If the canvas has a strong printed image or dark color and your fabric is thin, cover it first with a layer of plain white cotton.
Choose a fabric scale that suits the wall
Pattern scale should match both the size of the canvas and the distance you will see it from. A small, busy print blurs into a single tone from across a room, while a large motif needs a canvas big enough to show at least one full repeat, and ideally two or three.
- Large canvas, viewed from a distance: bold, simple shapes with clear contrast.
- Small canvas in a hallway or beside a desk: finer prints and textures that reward a close look.
- Textured solids such as linen, bouclé or slub cotton: good at any size where the room already has plenty of pattern.
Medium-weight woven cotton, linen and light upholstery fabric wrap well. Very stretchy fabric distorts as you pull it, and very thick fabric makes bulky corners. To decide how big the canvas itself should be, use the proportions in how to measure for wall art as a starting point.
Measure the overlap
The fabric has to cover the face, wrap around the edge and reach far enough across the back of the frame to take a staple. For each dimension, add together the canvas size, twice the depth of its edge, and about 4 in (10 cm) of extra.
For example, a canvas 16 x 20 in (40 x 50 cm) with a 3/4 in (2 cm) edge needs a piece roughly 22 x 26 in (56 x 66 cm). Extra fabric is easy to trim; too little cannot be fixed.
Before cutting a patterned fabric, lay the canvas on it and decide which part of the design falls in the middle. Mark the canvas corners with pins or chalk, then measure the overlap outward from those marks.
Press the fabric
Iron the fabric thoroughly at the setting recommended for its fiber. Stretching removes slight slackness but not sharp fold lines, and a crease on a large flat surface is the first thing the eye finds. If the fabric was stored folded, a little steam or a damp pressing cloth helps.
Staple from the centers outward
Lay the pressed fabric face down on a clean table and center the canvas on it, also face down.
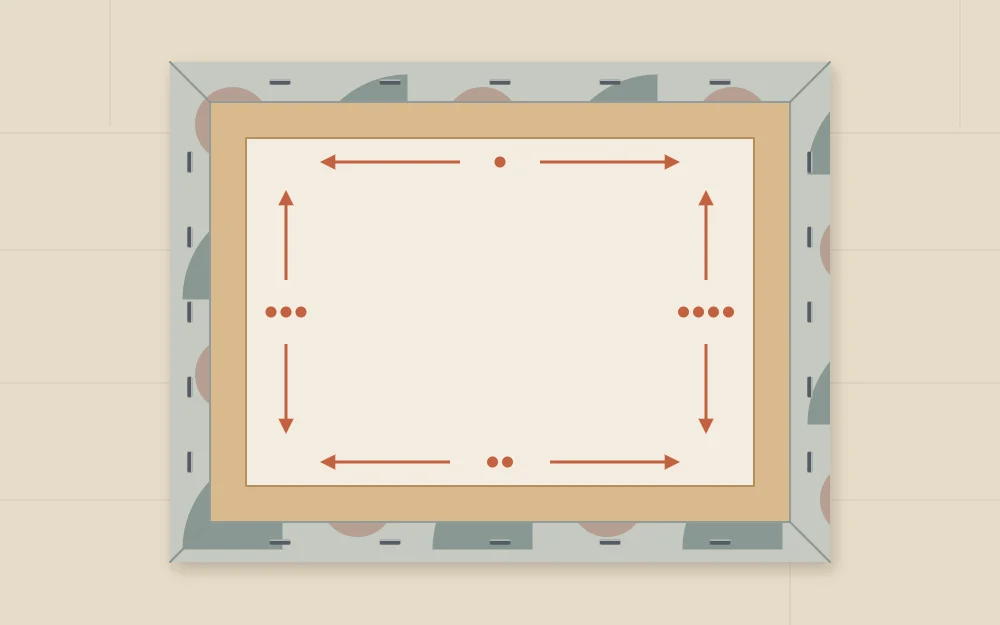
- Fold the fabric over the middle of one long side and put in a single staple at the center.
- Move to the opposite side, pull the fabric snug, and staple its center.
- Repeat on the two short sides. You now have four staples forming a cross, and a slight diamond of tension on the front.
- Turn the canvas over and check the front. The pattern should be straight and centered. If not, pull the staples and adjust now.
- Return to the first side and add a staple on each side of the center one, about 2 in (5 cm) apart, pulling gently outward toward the corners as well as back.
- Do the same on the opposite side, then the other pair. Keep rotating, adding a few staples per side each round.
- Stop about 3 in (7.5 cm) short of each corner.
Pull firmly but evenly. The goal is a flat, smooth surface, not maximum tension; overpulling one side drags the pattern off line.
Watch out
Follow the staple gun manufacturer’s instructions, keep your free hand clear of the front of the tool, and check that the staples are shorter than the frame is thick.
Keep a pattern straight
Stripes, checks and grids show every wobble. Use a line in the pattern as your guide: it should run parallel to the canvas edge along its whole length.
After each round of staples, turn the canvas over and sight along the edge. If a stripe drifts, remove the last few staples on that side, ease the fabric back and re-staple. Correcting after every round takes seconds; correcting at the end means starting again. If perfectly straight lines sound stressful, choose a scattered or organic pattern for a first attempt, since it hides small shifts.
Fold neat corners
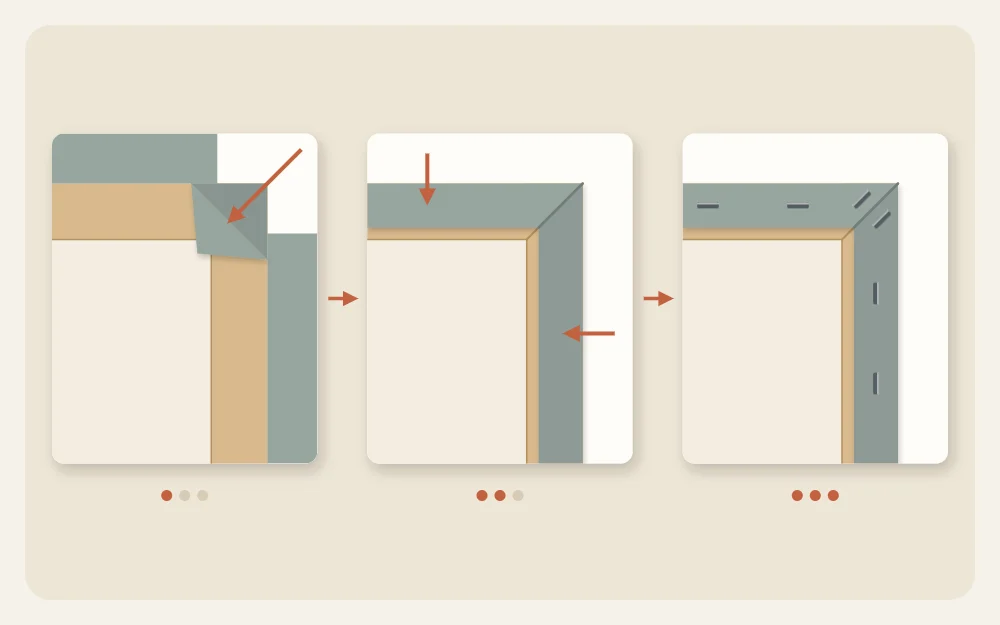
Corners decide whether the piece looks finished from the side. Fold all four the same way so the folds match.
- Pull the corner point of the fabric diagonally across the corner of the frame, straight toward the center of the canvas, and put one staple in it.
- Fold one side flap in so its folded edge runs exactly along the corner edge of the canvas.
- Fold the second flap over it in the same way, smooth both flat, and staple them down on the back.
If the corner is bulky, open it and trim away some of the hidden fabric inside the fold before stapling. Place the folds so they sit on the top and bottom edges of the canvas, where they are least visible once it hangs.
Finish the back and hang
Trim the excess fabric about 1/2 in (12 mm) beyond the staple line. For a tidy back, cover the raw edges with a strip of paper tape or glue on a sheet of kraft paper cut slightly smaller than the frame.
A fabric-wrapped canvas is usually light, but weigh the finished piece before choosing how to hang it. Identify your wall material, pick hardware that the manufacturer rates for that weight and wall type, and follow the package instructions; how to hang lightweight wall art walks through the options. For a very large piece, an unknown wall or a rental, ask the landlord or a professional first.
Leftover fabric from the same length can go into a small companion piece, such as the round frames in fabric wall art in embroidery hoops.
Frequently asked questions
Can I stretch fabric over a bare wooden frame instead of a canvas?
Yes. A plain stretcher frame works, but with nothing behind the fabric, thin cloth may let the wall color or the frame's shadow show through. Staple a layer of plain white cotton on first, or choose a thicker, more opaque fabric for the top layer.
How tight should the fabric be?
Tight enough to lie flat and smooth with no ripples, but not so tight that the weave or pattern pulls out of line. Even tension matters more than high tension. Pull the same amount on opposite sides and check the front after every round of staples.
What should I do if wrinkles appear after stapling?
Find the side the wrinkle points toward, remove a few staples there with a flat screwdriver, pull the fabric gently outward and toward the nearest corner, and re-staple. Diagonal wrinkles near a corner usually mean the corner fold needs to be opened and pulled again.