How to Hang Lightweight Wall Art Without Guesswork
A careful method for hanging light handmade pieces: weigh the piece, identify the wall, choose hardware its manufacturer rates for both, check for wires and pipes, then mark and level.

A paper collage in a thin frame, a small canvas, a yarn hanging on a dowel: handmade pieces are usually light, and that makes them easier to put up than a heavy mirror. Easier still leaves room for guessing, though. Knowing how to hang lightweight wall art well comes down to four facts you can check: what the piece weighs, what the wall is made of, what the hardware is rated for, and what is hidden behind the surface.
This guide gives you a method, not a product recommendation. Hardware differs from one maker to the next, so the package in your hand is the authority on what it can do.
Weigh the finished piece
Weigh the piece exactly as it will hang: framed, glazed, with its backing board, wire and any hanger already attached. Glass and solid wood frames add more than most people expect.
A kitchen scale handles small pieces. For larger ones, stand on a bathroom scale with and without the piece and subtract. Write the figure on a note; you will compare it with the rating printed on the hardware package.
Identify the wall material
The same hook behaves very differently in different walls, so find out what you have before you shop.
- Drywall sounds hollow when you knock between the framing and solid over a stud. It is the most common interior wall in newer homes.
- Plaster is harder, often slightly uneven, and common in older buildings. It can crack or crumble around a fixing, so it needs hardware intended for it.
- Masonry, meaning brick, block or concrete, feels solid and cold everywhere and needs fixings and tools made for masonry.
- Paneling and tile may hide another material behind, and holes in either are hard to conceal.
Surface matters as well. Textured paint, wallpaper, fresh paint and humid rooms all affect how adhesive products grip, and their packages usually say so.
If you cannot tell what the wall is, or it sounds different from one spot to the next, treat that as a reason to ask someone who knows the building.
Choose hardware rated for that weight and that wall
Every hanging product should state a weight rating and the wall types it suits. Choose one whose manufacturer rates it for at least the weight you measured, on your kind of wall. If the package does not list your wall material, pick a different product.
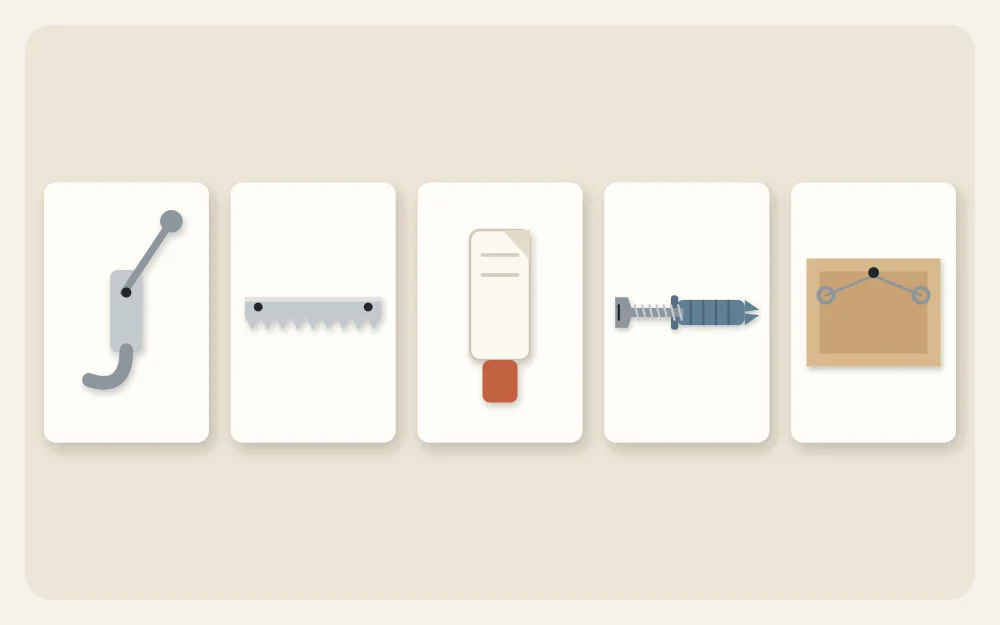
| Hardware type | How it works | Check on the package |
|---|---|---|
| Picture hook with a nail | A thin nail driven at an angle through a small hook | Rated weight and suitable wall types |
| Sawtooth hanger | A toothed bar on the frame back that rests on a nail or hook | Rating of the hanger and of the wall fixing |
| Removable adhesive strips | Pressure-sensitive strips pressed between frame and wall | Rated weight, allowed surfaces, press and wait times, removal steps |
| Screw with a wall anchor | An anchor that grips inside the wall and takes a screw | Rating for your wall material and the drill size |
A hanging system is only as strong as its weakest part. The fitting on the frame, the wire or cord, and the fixing in the wall each need to suit the piece. For attaching hangers to a frame back, see the guide to framed craft wall art.
Read and follow the package instructions
The rating on a package assumes the product is installed exactly as described. That often includes details that are easy to skip: cleaning the wall first, how long to press, how long to wait before loading, how many strips a given frame size needs, or which drill bit to use.
Keep the package or take a picture of the instructions, including the removal steps. Adhesive products in particular are meant to be removed in a specific way, and how the surface looks afterward depends on the paint, the wall and the technique.
Watch out
No hanging product can promise what will happen on every wall. If the piece is valuable, fragile, glazed or going above a bed, a sofa or a crib, be more cautious than the package requires, or ask a professional.
Check for wires and pipes before making a hole
Electrical cables and water pipes run inside walls. Cables often travel straight up, down or sideways from switches, outlets and light fittings, and pipes are common near kitchens, bathrooms and radiators, but neither can be assumed from position alone.
A stud finder with live-wire and metal detection, used according to its manufacturer’s instructions, lowers the risk. It does not remove it. If a detector signals something, or you have any doubt about a spot, do not drill or nail there; move the piece or get advice.
Mark the position accurately
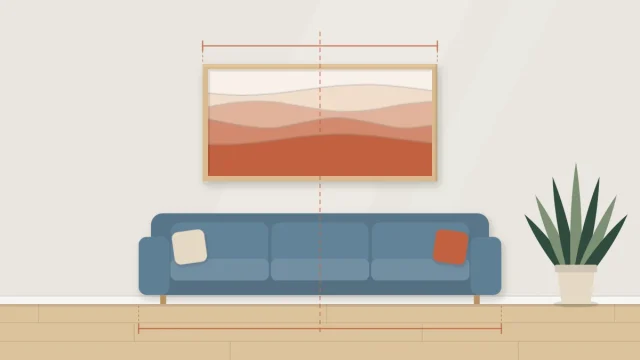
Decide the height and placement first; how to measure for wall art covers the usual guidelines. Then transfer the hanger position to the wall.
- Stick a strip of painter’s tape across the back of the frame, over the hanger or hangers.
- Mark the tape exactly where each fixing will sit. For a wire, pull it taut toward the top first and mark its highest point.
- Measure from that mark to the top of the frame and note it.
- Move the tape to the wall, set it with a level, and check that the frame’s top edge will land where you planned.
- Install the hardware through the marks, then peel the tape away.
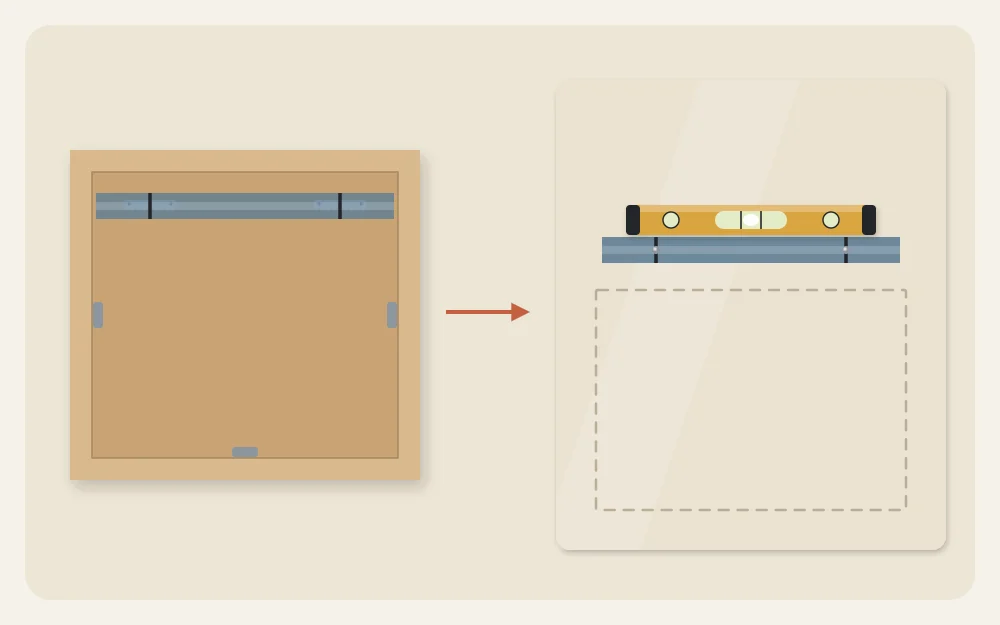
Two fixings keep a frame level better than one. For several pieces at once, the paper templates described in how to arrange a gallery wall do the same job across a whole wall.
Level, load and recheck
Hang the piece, rest a small level on top of the frame and adjust.
Look again after a day and after a week. A frame that has tilted, a strip that has started to peel or a hook that has loosened is telling you to take the piece down and rethink the hardware.
When to ask the landlord or a professional
- You rent. Read the lease and ask the landlord what is allowed before making holes or using adhesives. Rules vary, and written permission avoids arguments later.
- The wall is unknown or fragile. Old plaster, tile, stone and walls that might contain hazardous older materials are jobs for someone qualified.
- The piece is heavy, large or valuable. This method is for light work. Anything beyond that deserves a professional installer.
- You are unsure about wires or pipes. An electrician or a building manager can tell you what runs where.
Frequently asked questions
What is the best hardware for hanging light wall art?
There is no single best choice, because it depends on the weight of the finished piece and on your wall material. Weigh the piece, identify the wall, then pick a product whose manufacturer rates it for that weight on that wall type, and install it exactly as the package instructions describe.
Can I use removable adhesive strips for a handmade frame?
Possibly. Compare the weight of your framed piece with the rating on the package and check that your wall surface is listed as suitable. Follow the manufacturer's steps for cleaning, pressing, waiting and removal. Results vary with paint, texture and humidity, so ask your landlord first if you rent.
How do I know if there is a wire or pipe behind the wall?
You cannot know for certain by looking. A detector with live-wire and metal sensing, used as its instructions describe, reduces the risk, and so does avoiding the areas in line with switches, outlets and plumbing fixtures. If there is any doubt, choose another spot or ask an electrician or building manager.