Folded Paper Geometric Wall Art: 3D Shapes on a Grid
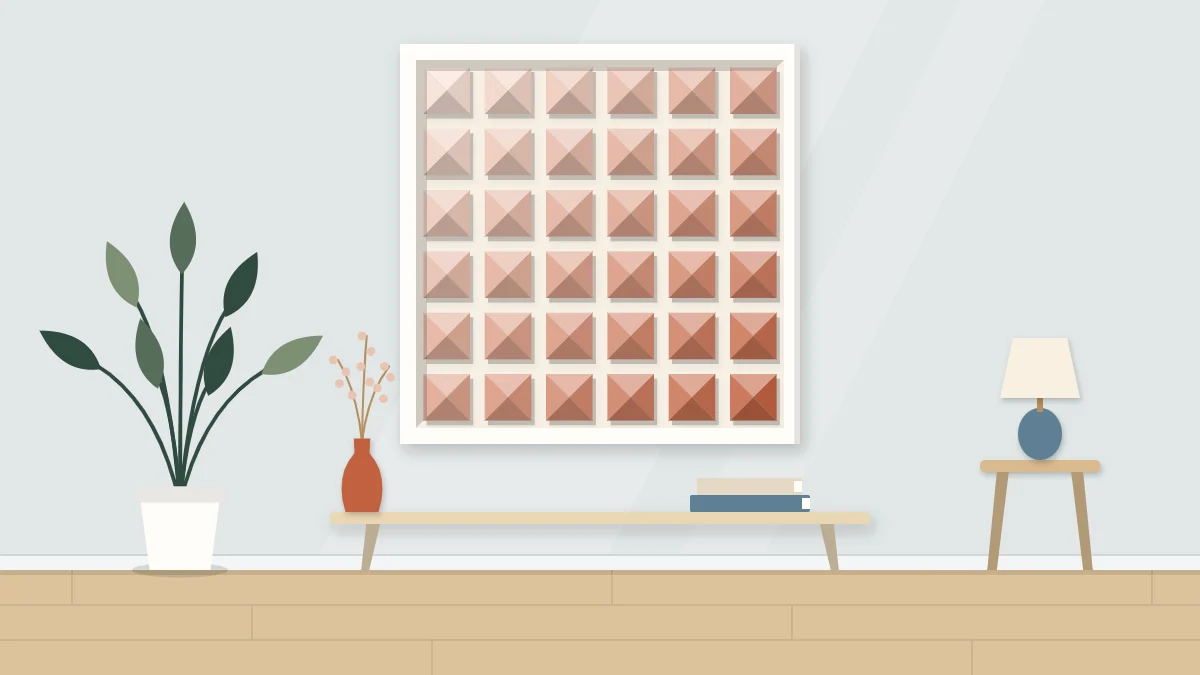
Score and fold small paper squares into identical pyramids or tents, then mount them on a pencil grid in one color or a gradient so light and shadow form the pattern.
Tutorial at a glance
Materials
- Paper or light card, 160 to 200 gsm
- Mat board or foam board
- Metal ruler and pencil
- Craft knife and cutting mat
- Bone folder or other scoring tool
- PVA glue or strong glue stick
Most geometric paper wall art is flat: shapes cut and glued side by side. This version stands up off the board. You score and fold small paper squares into identical low pyramids or tents, then mount them on a pencil grid so that each unit catches light on one side and throws a small shadow on the other.
One unit is unremarkable. Twenty-five of them, evenly spaced, become a surface that shifts as you walk past it. The skills involved are scoring, folding crisply and spacing accurately, and each is easy to practice on a spare sheet.
What you need
- Paper or light card of about 160 to 200 gsm, in one color or several tones of one color
- A rigid board such as mat board or foam board, 12 x 12 in (30 x 30 cm)
- Metal ruler, pencil, craft knife and cutting mat
- A scoring tool: a bone folder, an empty ballpoint pen or the back of a butter knife
- PVA glue or strong glue stick, and a small brush or cotton swab
Paper weight matters. Thin office paper will not hold a fold against gravity, and thick card cracks along the score. Fold a test piece before buying a full set of sheets.
Choose your unit: pyramid or tent
Both units start from the same small square. Choose one and use it for the whole piece.
| Unit | Folds | Character |
|---|---|---|
| Low pyramid | Two diagonal scores, one slit, one glued overlap | Four facets, a soft point, shadows in every direction |
| Tent | One center score, two narrow glue tabs | A single ridge, strong directional light |
The pyramid is described in detail below. For a tent, cut a rectangle a little wider than your grid cell, score a line down the middle and one about 1/4 in (6 mm) in from each long edge, fold the center up as a ridge and the two edge strips under as tabs.
Cut and score the squares
For a 12 in board with a margin, 2 in (5 cm) squares in five rows of five work well. Cut a few extra.
- Rule the sheet into 2 in (5 cm) squares and cut them out with the knife against the metal ruler. Cut away from the hand holding the ruler, on a cutting mat.
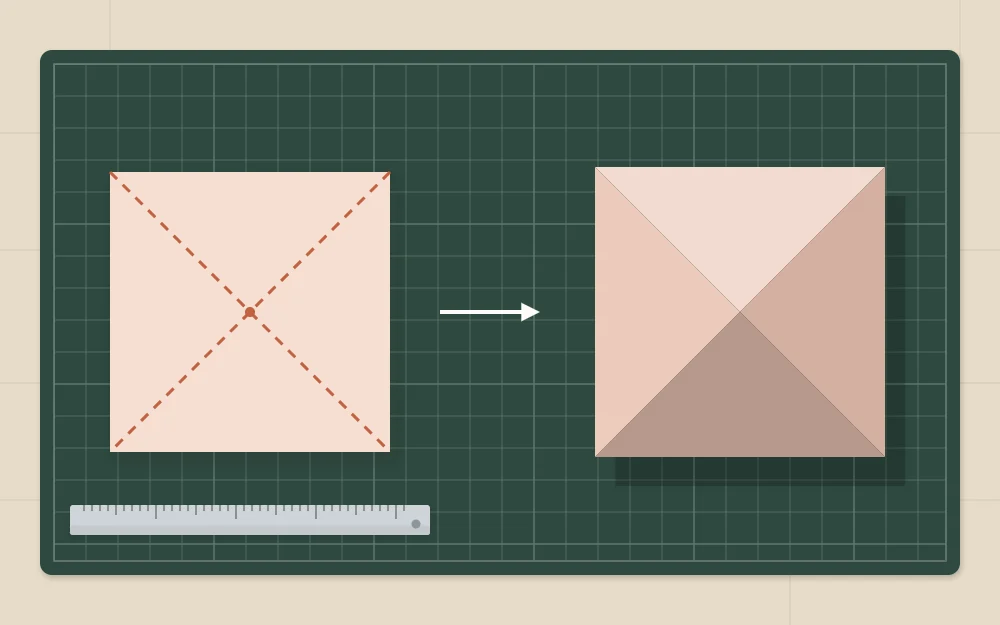
- Lay the ruler from corner to corner on one square and draw the scoring tool along it with firm, even pressure. You are denting the paper, not cutting it.
- Score the second diagonal the same way, so the two lines cross at the center.
- Cut one slit from the middle of any side straight to the center point.
Fold crisp and glue the tab
Fold along each score with the scored line on the outside of the fold, so the diagonals rise as four ridges. Run a fingernail or the bone folder along each one, then open the square flat again.
The slit has divided one triangle into two flaps. Slide one flap over the other by about 3/8 in (1 cm) and the center lifts into a low pyramid. That overlap is your glue tab. Put a small dab of glue between the flaps, press, and hold for a few seconds.
Use the same overlap on every unit so they all match.
Tip
Fold in batches: score all the squares, then slit them all, then fold, then glue. Repeating one motion at a time keeps the units more alike than finishing them one by one.
Plan one color or a gradient
A single color, especially white or a pale neutral, puts all the emphasis on light and shadow. It is the calmest option and the most forgiving of small differences between units.
A gradient adds a second kind of movement. Choose three to five tones of one color and decide which way they run: top to bottom, side to side, or corner to corner. With five rows and five tones, each row gets its own tone. With three tones, use two rows of the lightest, one of the middle and two of the darkest, or blend the boundary by mixing two tones within a row.
Lay the finished units out on the table in order before you glue, and view them from across the room. If one tone jumps out, swap it for a closer one. Building depth from flat tonal sheets instead of folded units is a different approach, covered in layered paper wall art.
Space the units with a pencil grid
Measure the footprint of a finished unit. Because of the overlap it is slightly smaller than the flat square, and not quite square, which is why the grid is drawn from the cell size and not from the units themselves.
- Mark a 1 in (2.5 cm) margin on all four sides of the board.
- Divide the remaining area into 2 in (5 cm) cells with light pencil lines, exactly as you would for the flat pattern in geometric triangle wall art.
- Mark the center of each cell with a small dot where the grid diagonals would cross.
- Glue each unit with its point over the dot. Apply glue only along the underside of the base edges, in a thin line.
- Work from the center row outward and check the alignment against the ruler every few units.
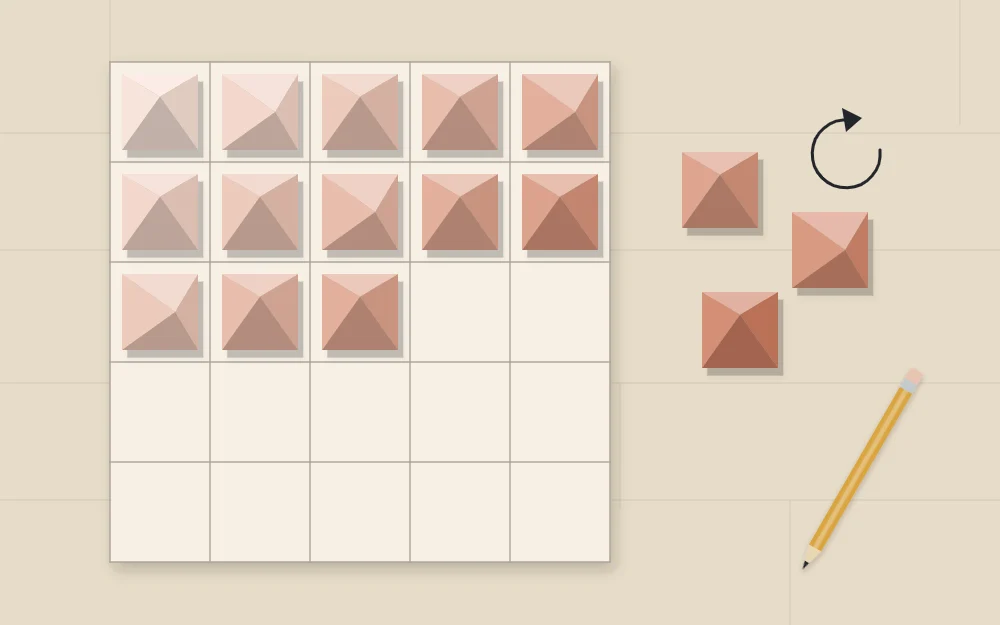
Rotate units to change the light
Each pyramid has one face with a doubled layer and a seam. Turning a unit by a quarter turn moves that face, and with it the way the light breaks across the unit. With tents the effect is stronger, since a ridge running up and down catches side light very differently from one running across.
- All the same way: the most uniform surface, with every seam hidden on the lower side.
- Alternating like a checkerboard: a woven look, with light and dark facets swapping from cell to cell.
- Rotating by row: soft horizontal bands that work well with a gradient.
Test the options on the dry layout under a lamp placed to one side before gluing anything.
Frame and hang
Erase any pencil that shows in the gaps. Folded paper crushes easily, so display the board in a deep box frame, with or without glass, or lean it on a shelf out of reach of traffic. Keep it away from damp rooms.
To hang it, weigh the framed piece, identify your wall material, and choose hardware that the manufacturer rates for that weight and wall type, following the package instructions.
For a sturdier relief with larger, bolder forms, cardboard relief wall art uses stacked shapes painted one color in place of folded paper.
Frequently asked questions
What paper is best for folded 3D shapes?
Paper or light card between about 160 and 200 gsm is a good range. It is stiff enough to keep a raised shape and thin enough to fold cleanly along a score. Lighter paper tends to slump, and heavier card may crack on the fold unless it is scored deeply.
Why do I need to score before folding?
Scoring compresses the paper fibers along a line so the fold follows it exactly. Without a score, heavier paper bends in a soft curve or creases slightly off the line, and small differences between units become obvious once they sit side by side on a grid.
Can folded paper art go behind glass?
Yes, if the frame is deep enough that the glass does not press on the points of the units. A box frame with a spacer works. Glass keeps dust off the folds, which are hard to clean, though it adds reflections that can soften the shadow effect.