How to Paint a Diptych or Triptych That Reads as One Piece
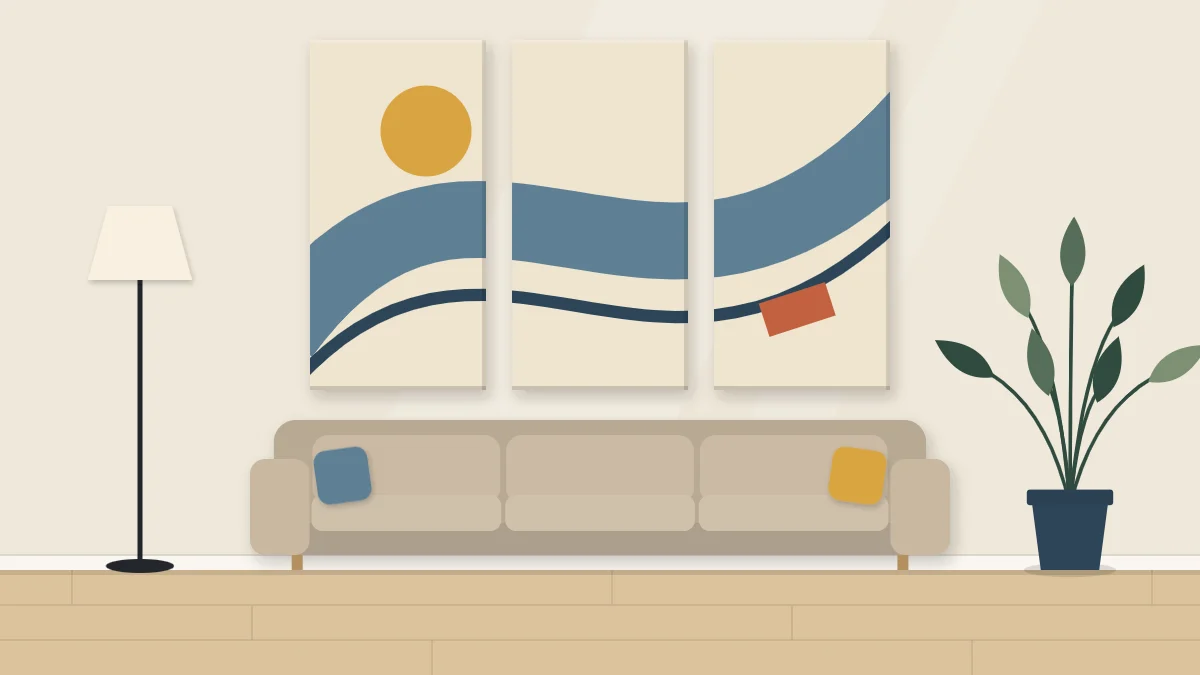
Paint two or three canvases as a single surface so the design flows across them, then keep the palette, order and hanging gap consistent so the set reads as one piece.
Tutorial at a glance
Materials
- 2 or 3 identical stretched canvases
- Acrylic paint in 3 or 4 colors plus white
- Wide flat brush, 2 in (50 mm)
- Painter's tape
- Lidded containers for mixed colors
- Pencil, ruler and spirit level
Diptych and triptych wall art fills a wide wall with something you can still paint on a kitchen table: two or three modest canvases instead of one enormous one. The difficulty is not the painting. It is making separate panels read as a single piece once there is a strip of wall between them.
That comes down to five decisions, and all of them are made before or during painting, not at hanging time: paint the panels as one surface, carry shapes across the gaps, keep the palette identical, mark the order, and choose the spacing with care.
Choosing the panels
A diptych is two panels and a triptych is three. For a first attempt, buy identical canvases: same size, same depth, same maker if possible, so the edges line up and the surfaces take paint the same way.
| Format | Good panel shape | Suits |
|---|---|---|
| Diptych | Two tall rectangles or two squares | Narrower walls, above a console or bed |
| Triptych | Three tall rectangles | Wide walls, above a sofa or sideboard |
| Stacked diptych | Two wide rectangles, one above the other | Tall, narrow spaces |
Work out the total width first, including the gaps, and compare it with the wall or furniture below. How to measure for wall art walks through that sum, so you can pick a canvas size with confidence before buying three of them.
Push the canvases together and paint as one
Lay the panels flat on a covered table in their final order, with the edges touching. Check that the top edges form one straight line. If the table is slippery, tape the panels together across the back with painter’s tape so they cannot drift while you work.
From this point, treat the group as one wide canvas. Sketch the composition lightly in pencil or thinned paint across the whole surface, ignoring the joins. Then block in the large shapes with a wide brush, letting each stroke travel from one panel onto the next without stopping.
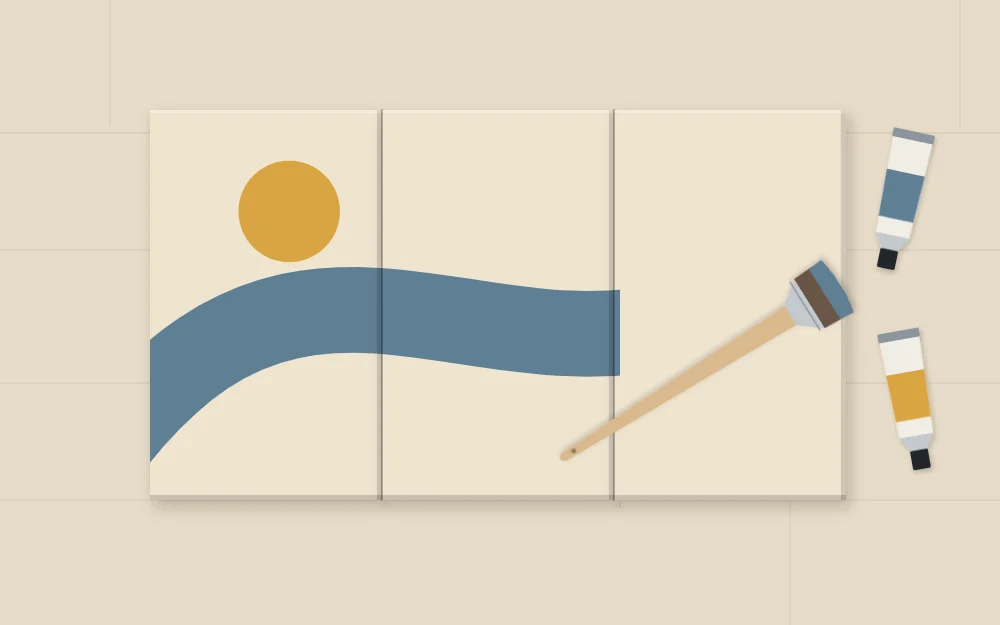
Painting the panels one at a time is the most common reason a set fails. Each one ends up with its own balance and its own center, and the result looks like three related paintings instead of one.
Carry shapes across the gaps
The eye connects the panels when something clearly continues from one to the next. Plan at least one large shape that crosses every join: a sweeping curve, a broad diagonal band, or a horizon-like line that runs the full width.
- Cross at an angle. A shape that meets the join on a slant is easier for the eye to follow across a gap than one that runs almost parallel to it.
- Keep crossings bold. Thin lines are hard to line up after hanging. Wide bands and large curves forgive a small error.
- Avoid a focal point on a join. Small, detailed marks that are split in half look like a mistake. Put them fully inside one panel.
- Let each panel hold something. If one canvas is nearly empty while the others are busy, the set looks unbalanced.
Simple, generous shapes work best here. If you want practice building a composition from a few large forms, start with abstract painting for beginners and then scale the idea up across panels.
Allow for the gap
When the panels are pushed together there is no gap, but on the wall there will be. A curve that flows smoothly across touching edges will appear to jump slightly once the panels are spaced apart. For gentle curves and wide bands this is barely noticeable. For steep diagonals, you can slide the panels apart to the planned gap while sketching, lay a ruler across to carry the line, and then push them back together to paint.
Keep the palette identical
Mix every color for the whole set at once, in larger amounts than you expect to need, and store the mixes in lidded containers between sessions. A color remixed halfway through seldom matches, and a small shift between panels is exactly what the eye picks up.
Limit the palette to three or four colors plus white. Use each color on every panel, even if only in a small patch. Keep your brushes and technique consistent too: if the first panel has visible, dry brush texture, the others need the same.
Tip
Paint in passes across the whole set. Do all the first layers, then all the second layers, instead of finishing one panel before starting the next.
Paint the edges and separate the panels
While the paint is still wet, slide the panels slightly apart so they do not dry stuck together, then continue each shape around the sides of its canvas. The inner edges are visible from an angle once the piece is hung, and bare white sides break the flow.
Let everything dry flat. Drying time depends on the paint and how thickly you applied it, so check the label before stacking or leaning the canvases.
Mark the order on the back
Abstract panels are surprisingly easy to mix up or turn upside down. Once dry, turn each one over and write on the stretcher bar in pencil:
- Its position, numbered from the left as you face the wall.
- An arrow pointing to the top.
- The gap you planned, so the measurement is on hand at hanging time.
Choose the gap when hanging
Spacing decides whether the set holds together. As a starting point, try a gap of about 1 to 2 in (2.5 to 5 cm) for small and medium panels, and adjust by eye. Narrow, even gaps let the shapes jump across. Wide gaps turn each panel into its own picture and the design breaks apart.
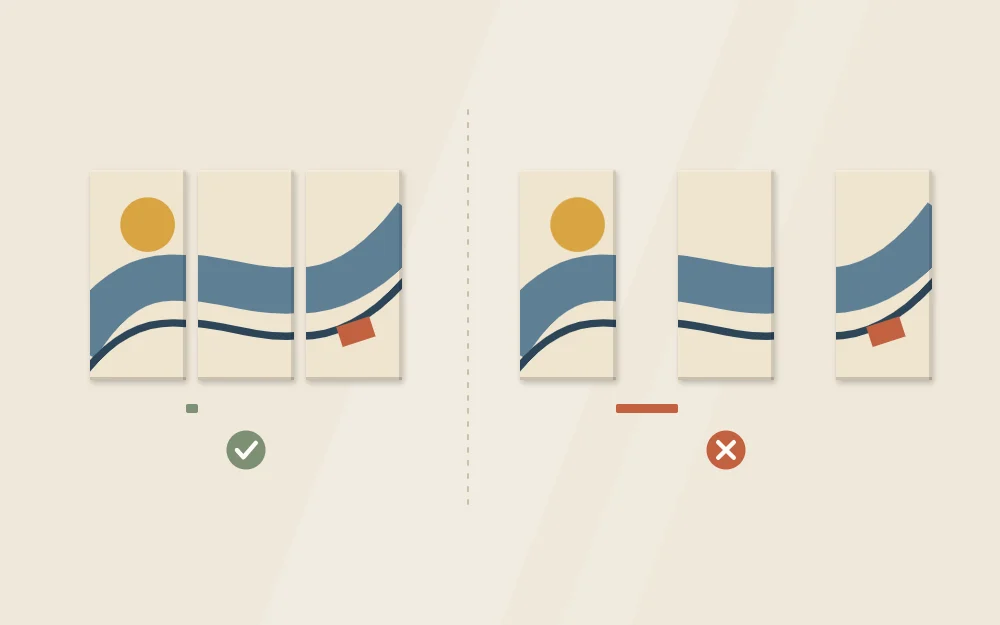
Test before making any holes. Cut paper templates the size of each panel, tape them to the wall with painter’s tape, and step back. The paper-template method in how to arrange a gallery wall works the same way for a row of matching panels.
Keep the tops level with a spirit level and measure each gap at both the top and the bottom. For the hardware, weigh a finished panel, identify what your wall is made of, and choose hangers, nails or adhesive strips that the manufacturer rates for that weight and wall type. Follow the package instructions, and ask your landlord or a professional if the wall is unfamiliar or you rent.
Frequently asked questions
How far apart should triptych panels hang?
A gap of roughly 1 to 2 inches is a common starting point for small and medium panels, with slightly more for very large ones. Tape paper templates to the wall first and step back. If the design stops flowing between panels, bring them closer together.
Do diptych panels have to be the same size?
No, but matching panels are much easier for a first project because the edges align and the design can cross the join cleanly. Unequal panels can look striking once you are comfortable, as long as their top or bottom edges line up.
Should I paint the sides of the canvases?
Yes, if the panels will hang unframed. The inner sides show when you view the set from an angle, and continuing each shape around the edge keeps the design connected. Slide the panels slightly apart while the paint is still wet to reach them.