DIY Wall Art Supplies: A Simple Starter Kit
A minimal starter kit described by type, not brand: cutting tools, the right glue for each material, a small acrylic palette, three brushes and five surfaces, plus what to leave on the shelf for now.

A short list of DIY wall art supplies will take you through most paper, paint and fabric projects. The kit below is described by type rather than by brand, because the category matters far more than the label: a sharp blade, a straight metal edge, the right glue for the material and a surface that stays flat.
Buy the basics first, make two or three pieces, and add tools only when a project asks for them. If you have not picked a route yet, the guide to choosing a first wall art project will narrow down which half of this list you need.
Cutting and measuring tools
Clean edges are what make handmade work look deliberate. Four tools cover nearly all cutting.
- Scissors. One sharp pair for paper. If you work with fabric, keep a second pair for fabric only; paper dulls blades quickly.
- Craft knife with spare blades. For straight cuts and inside corners that scissors cannot reach. A fresh blade cuts better than a firm hand on a dull one. Cut away from your holding hand, on a cutting mat.
- Self-healing cutting mat. Protects the table and keeps the blade from skating. A mat around 12 x 18 in (30 x 45 cm) suits most small work.
- Metal ruler. A knife will shave a plastic or wooden ruler and wander off line. A 12 in (30 cm) steel ruler with a cork back grips the paper.
Add a soft pencil, a white eraser and a roll of low-tack painter’s tape. The tape holds paper in place, masks straight paint lines and marks positions without leaving a pencil line behind.
Glue matched to the material
Most glue problems, such as wrinkles, lifted corners and shiny patches, come from using one glue for everything. Match the adhesive to what you are sticking down.
| Adhesive type | Best for | Keep in mind |
|---|---|---|
| Glue stick | Thin paper on paper | Low moisture, so little wrinkling; a weaker bond on heavy pieces |
| PVA (white craft) glue | Cardstock, cardboard, yarn ends | Spread it thin; too much warps paper |
| Double-sided tape or foam pads | Raised layers, quick mounting | Hard to reposition once pressed |
| Fabric glue or fusible web | Fabric on fabric or board | Follow the product instructions for heat and setting time |
A glue stick and a small bottle of PVA are enough to begin. Use an old flat brush or a scrap of card to spread PVA into an even film, and press glued paper under a heavy book while it sets. Check each label for setting time, ventilation and cleanup.
Acrylic paint basics
Acrylic paint is the usual choice for home wall art: it thins and cleans up with water while wet, dries fairly quickly and can be painted over once dry. Student-grade tubes or craft bottles are fine for learning.
You do not need a large set. A workable starter palette is:
- White, in the largest container you buy, because it goes into almost every mix
- A warm and a cool primary, such as a red and a blue, plus a yellow
- One earth tone, such as a soft brown or ochre, for calming bright mixes
- Black, used sparingly, or a dark blue to deepen colors instead
Paint dries a shade or two different from how it looks wet, so mix more than you think one area needs. Matching a custom color the next day is harder than it sounds. A paper plate or a glazed tile works as a palette, and two water jars, one for rinsing and one for clean water, keep colors clear.
Brushes and spreading tools
Three synthetic brushes handle most projects, and synthetic bristles hold up well in acrylic.
- Flat brush, about 1 in (25 mm). For filling areas and painting canvas edges.
- Small round brush. For lines, dots and tidying edges.
- Wide flat or wash brush, about 2 in (50 mm). For backgrounds and base coats on larger pieces.
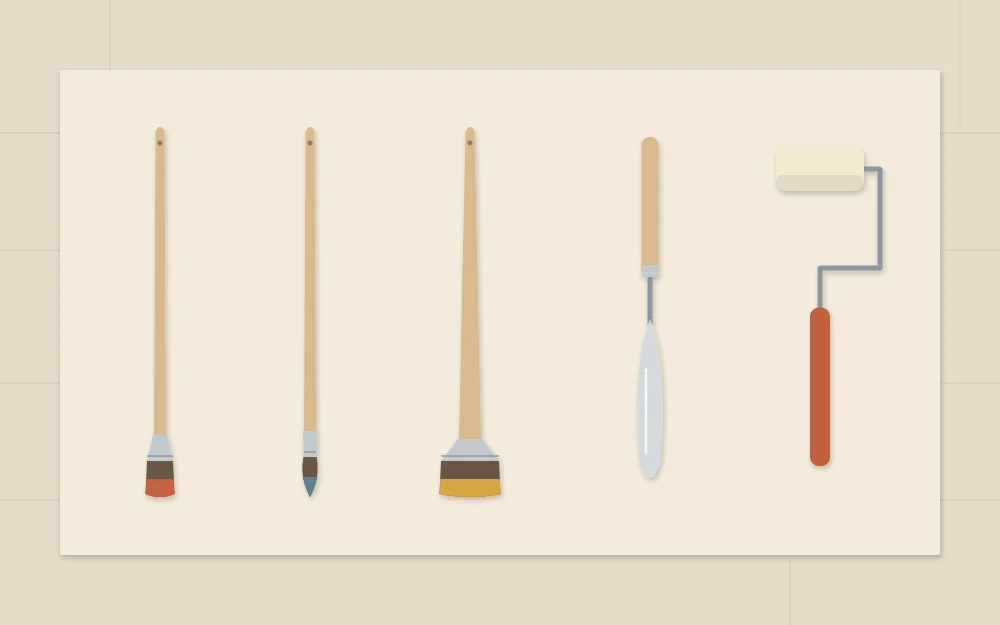
A palette knife mixes paint without clogging a brush and spreads texture paste. A small foam roller lays down a flat, stroke-free field of color. Neither is essential on day one. Whatever you use, wash it before the paint dries in it; dried acrylic is very difficult to remove from bristles.
Surfaces to work on
The surface decides how the finished piece is displayed, so choose it with the end in mind.
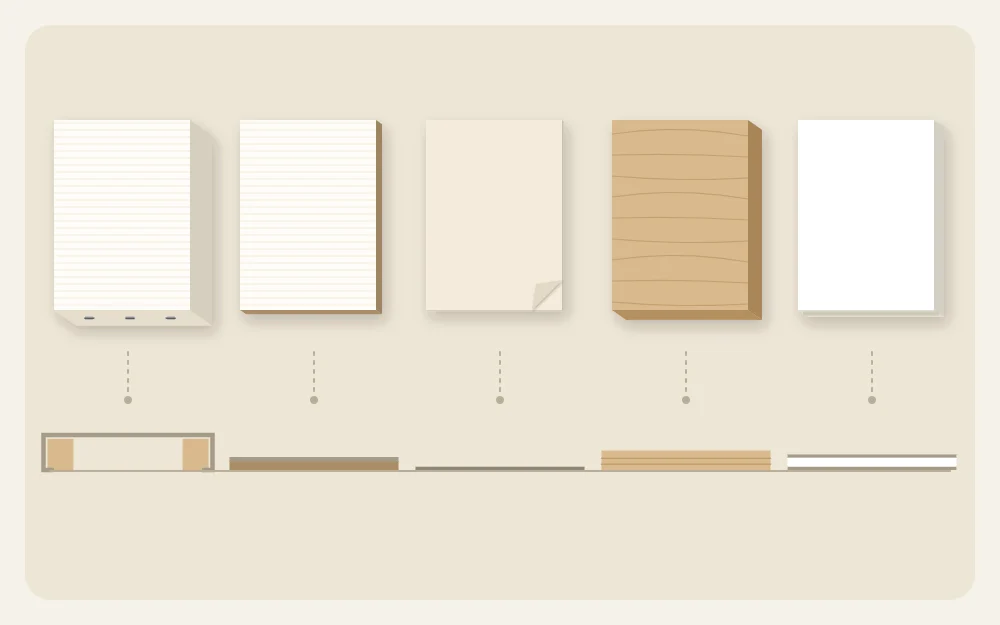
- Stretched canvas. Fabric over a wooden frame with a deep edge. Can be shown without a frame, which is why the two-color canvas project uses one.
- Canvas panel. Canvas glued to a thin rigid board. Cheaper, flat, good for practice and for texture, and easy to drop into a frame.
- Heavy paper. For paint, look for paper of roughly 300 gsm, which resists buckling when wet. For cutting and layering, cardstock around 160 to 220 gsm cuts cleanly and holds a shape. The guide to layered cardstock art goes into paper weight in more detail.
- Wood panel. Rigid and smooth, suited to crisp taped shapes. It usually needs a coat of primer first; check the primer label.
- Foam board. Very light and easy to cut with a knife. Useful as a backing board or mount, less so as a painting surface because it dents.
What to skip at first
Craft aisles are full of tools that solve problems you do not have yet. These can wait until a specific project needs them:
- Large paint sets with dozens of colors; mixing from a few teaches more
- An easel; a table covered with a plastic sheet works for small pieces
- Electronic cutting machines and shaped punches
- Specialty mediums, gels and varnishes
- Expensive brushes, which a beginner will wear out learning to clean them
Tip
Keep a scrap folder. Offcuts of painted paper, cardstock and fabric become test swatches and small collage shapes for later projects.
Storing the kit
One shallow box holds everything on this list. Store brushes flat or bristle-up once dry, keep paper flat in a folder away from damp, and close paint lids firmly so the paint stays workable. Slide the blade cover back on the craft knife before it goes in the box.
Hanging hardware is deliberately missing from this kit. Nails, hooks and adhesive strips should be chosen once a piece is finished and weighed, to suit the wall it is going on, and used according to the manufacturer’s instructions.
Frequently asked questions
What paper weight should I buy for wall art?
It depends on the job. For cutting, folding and layering, cardstock in the range of 160 to 220 gsm is sturdy without being hard to cut. For painting with acrylic or watery washes, paper near 300 gsm stays flatter. Thin printer paper is best kept for sketches and templates.
Is a stretched canvas or a canvas panel better for a beginner?
Both work. A canvas panel costs less, lies flat and suits practice pieces or anything you plan to frame. A stretched canvas has a deep edge that can be painted, so the piece looks finished without a frame. Many beginners practice on a panel and then move to stretched canvas.
How many paint colors do I really need to start?
Five or six tubes are enough: white, a red, a blue, a yellow, one earth tone and optionally black. Mixing from a small set produces colors that relate to each other, which makes a finished piece look more unified than colors taken straight from a large assortment.