Botanical Paper Cut Wall Art: Simple Leaf Shapes
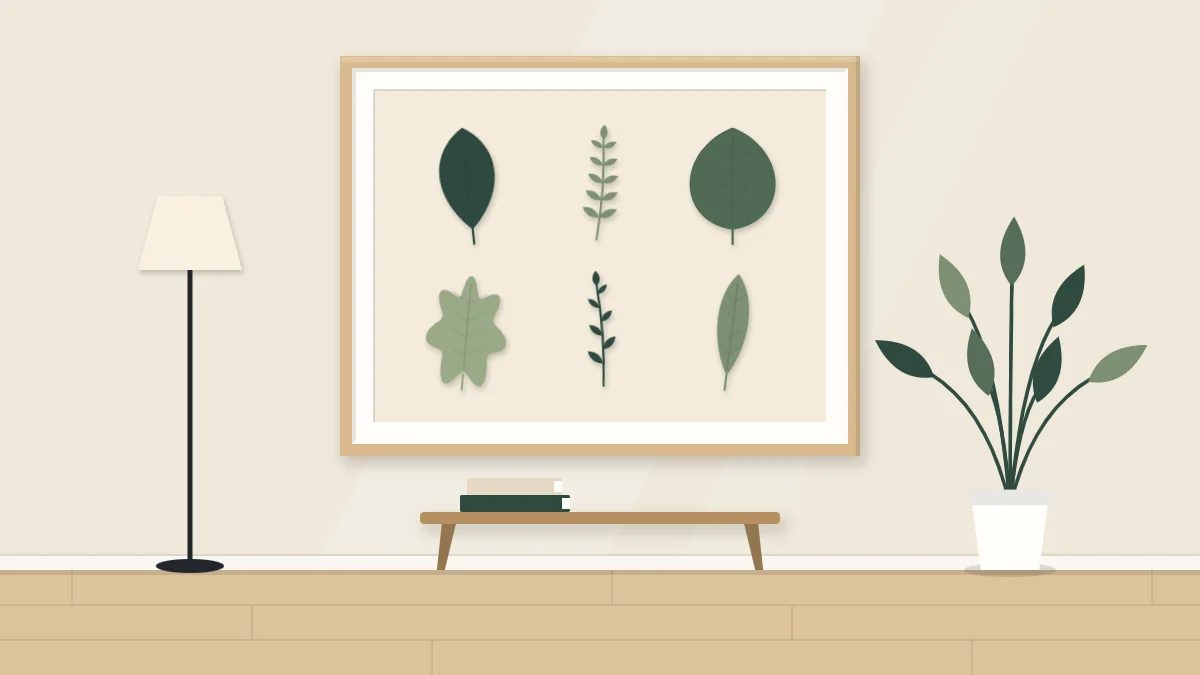
Fold, draw half a leaf and cut: four easy leaf shapes arranged like a specimen sheet on a cream background. Gluing only the spine lets the edges lift for a light, dimensional finish.
Tutorial at a glance
Materials
- Paper in 3 to 4 greens, 120 to 160 gsm
- Cream base paper or card, 250 to 300 gsm
- Small sharp scissors
- Craft knife and cutting mat
- PVA glue and a toothpick
- Pencil
- Shadow box or frame with a spacer
Botanical paper cut wall art borrows the look of a pressed-plant specimen sheet: a handful of leaves and stems, evenly spaced on a pale ground, each one clear enough to study. The difference is that every leaf here is cut from folded paper, so both halves match without any careful drawing.
You do not need to render a real species. Four simple leaf shapes, invented from basic curves, are enough to fill a frame. Glued along the spine only, their edges lift a little and catch the light.
Gather paper in a few greens
Choose paper of about 120 to 160 gsm. It folds without cracking, cuts easily through two layers, and still has enough spring to lift at the edges once glued. Heavy cardstock is hard to cut double and tends to leave a bulky crease.
Three or four greens are plenty: a pale sage, a mid green, a deep green, and perhaps an olive or blue-green for variety. For the background, use cream or off-white paper or card of around 250 to 300 gsm, which stays flat and keeps the leaves as the focus.
Draw half a leaf on the fold
Symmetry comes from the fold. You draw one half, cut through both layers, and open the paper to find a complete leaf with a center crease that doubles as its midrib.
- Cut a rectangle of paper a little larger than the leaf you want.
- Fold it in half lengthwise, colored side in, and press the crease firmly with a fingernail.
- With the fold on your left, draw half a leaf in pencil. The line starts on the fold at the base, swells outward, and returns to the fold at the tip.
- Cut along the line through both layers with small sharp scissors, turning the paper as you go.
- Open the leaf. Leave the crease slightly raised instead of flattening it.
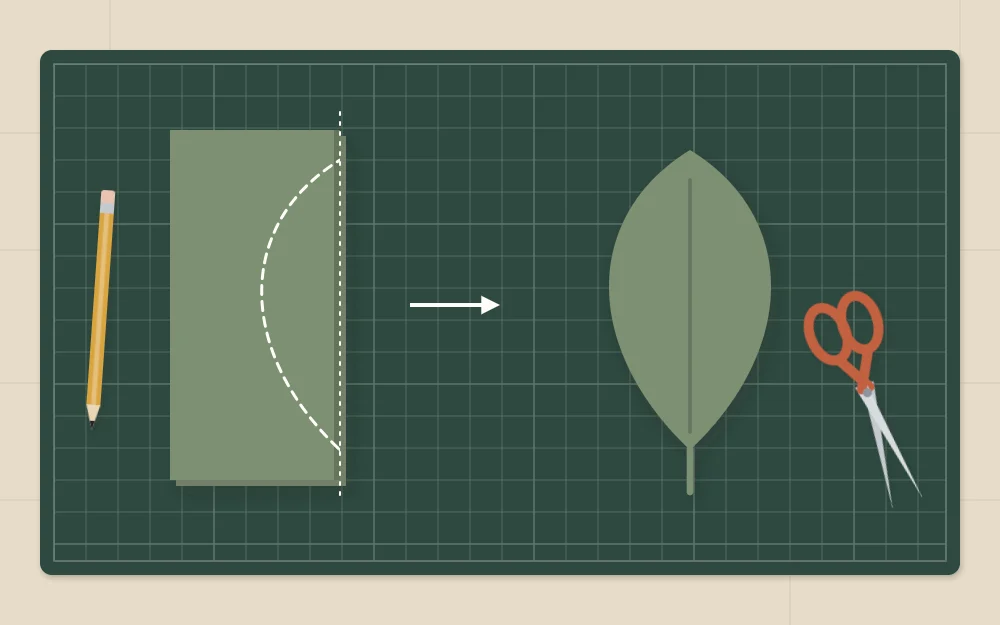
Because the pencil line is on the back, there is nothing to erase. Sketch your own outlines; after two or three leaves most people stop drawing and cut by eye, which gives each one a slightly different character.
Four easy leaf types
Variety in outline is what makes the sheet read as a collection. These four are grouped by shape, not by plant, and each starts from the same half-on-the-fold method.
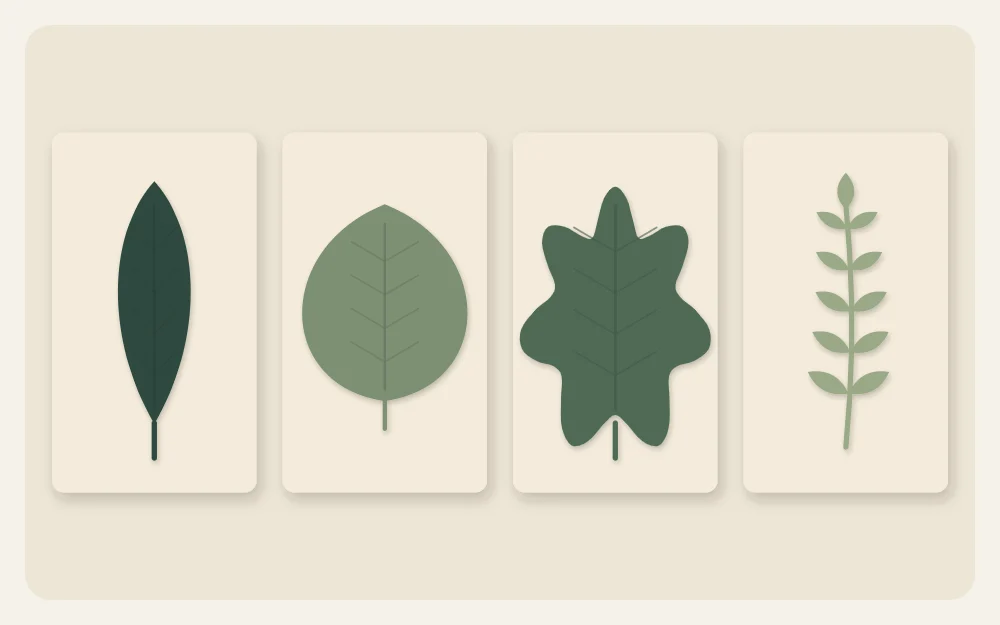
Long oval
A narrow leaf, widest near the middle and pointed at both ends. Draw a shallow arc from base to tip. It is the easiest shape and a good one to make in several lengths.
Rounded leaf
Wide and short, almost a circle with a small point at the tip. Draw a full half-round curve that pinches in just before it meets the fold.
Lobed leaf
An outline with three or four soft bumps along each side. Draw the bumps as a wavy line that moves in and out from the fold, with the dips reaching about halfway back toward the crease. Cut slowly around the inside curves, or use a craft knife on a cutting mat, cutting away from your hand.
Stem with paired leaves
A thin stem with small leaflets in pairs. Fold a long strip, then draw a narrow stem right along the fold with three to five small ovals branching off it at an upward angle. Keep the stem at least 1/8 in (3 mm) wide on the folded side so it does not tear when opened.
Add separate stems to the single leaves by cutting thin, gently curved strips freehand. A stem that bends slightly looks more alive than a ruled line.
Arrange with even spacing
A specimen-sheet layout is calm and orderly. Each plant has its own territory, and the gaps between them are as considered as the shapes.
- Plan for six elements in two rows of three, or five in a looser row, on a base of about 11 x 14 in (28 x 36 cm).
- Keep a clear margin of roughly 1 1/2 in (4 cm) around the outside.
- Leave similar gaps between neighbors. Nothing overlaps and nothing touches.
- Stand every stem upright or tilt each one just a few degrees, alternating left and right.
- Mix the greens and the shapes so that two of the same kind do not sit side by side.
Lay everything out dry and step back. Swap positions until the sheet feels evenly weighted, with no heavy corner. Then mark the top and bottom of each stem with two faint pencil dots so you can return each piece to its place.
Tip
Cut a strip of scrap card to the width of your gap and use it as a spacer between elements. It is quicker than measuring each one.
Glue only the spine
This step gives the piece its depth. Instead of covering the back of a leaf with glue, apply it to the crease alone.
- Glue the stems down first. A glue stick, or PVA glue applied with a toothpick, is enough for thin strips.
- Turn a leaf face down and run a fine line of PVA along the back of the center fold only.
- Set the leaf in place so its base just covers the top of the stem.
- Press along the crease with a fingertip for a few seconds. Leave the two sides free.
- Once every leaf is on, gently lift the edges so each one sits in a shallow V.
Let the glue dry flat and undisturbed; check the label for the drying time. Do not press this piece under books, or the lifted edges will flatten.
Frame it with room to breathe
Raised leaves need space behind the glass. A shadow box or a frame with a spacer keeps them from being pressed down; the section on frame depth in layered paper wall art shows how to measure what you need. Hanging the frame without glass is another option in a room free of steam and dust.
To hang it, weigh the finished frame, identify the wall material, and pick hardware its manufacturer rates for that weight and wall type. Follow the package instructions.
More botanical projects
If you enjoy drawing the outlines as much as cutting them, botanical line painting uses similar stems and leaves with a brush and a single color. For a seasonal version of this project, fall leaf paper wall art swaps the greens for warm rusts and golds.
Frequently asked questions
How do I cut paper leaves that are symmetrical?
Fold the paper in half, draw half of the leaf with its center line on the fold, and cut through both layers at once. When you open the paper the two sides match exactly, and the crease becomes the midrib. Small, sharp scissors make the curves easier to follow.
What paper should I use for paper cut leaves?
A medium paper of about 120 to 160 gsm works well. It is thin enough to cut neatly through two folded layers and firm enough for the edges to stand away from the background once the spine is glued. Solid-color paper dyed through gives the cleanest cut edge.
Can I frame paper cut leaves behind glass?
Yes, as long as there is space between the glass and the paper. A shadow box or a spacer inside the frame stops the glass from flattening the lifted edges. If you prefer a flat look, glue the whole leaf down and a standard frame with a mat will work.