Framed Craft Wall Art: How to Frame Small Handmade Pieces
Make small paper, fabric and painted pieces look finished in ready-made frames: mat proportions, a clean backing sheet, light mounting methods, depth for raised work and a consistent set.

Tutorial at a glance
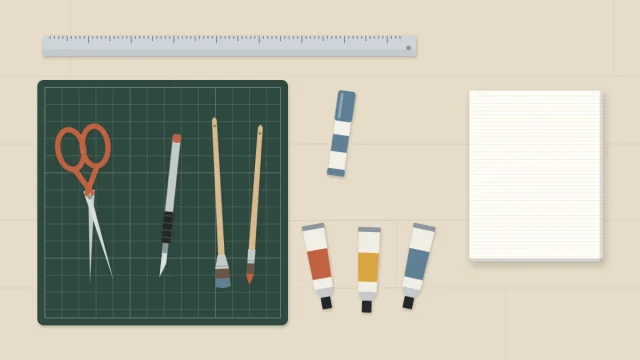
Materials
- Ready-made frame with mat
- Heavy paper or thin card, 200 to 300 gsm
- Paper tape for hinges
- PVA glue or glue stick
- Craft knife, metal ruler and cutting mat
- Pencil and soft cloth
A frame changes how a small handmade piece is read. The same paper shape that looked like a scrap on the table becomes framed craft wall art once it sits centered in a wide mat behind clean glazing. Most of that effect comes from proportion and neat mounting, not from an expensive frame.
This guide covers ready-made frames only: how to choose one, how to size the mat, how to fix paper or fabric in place so it stays flat, and how to give raised work room to breathe.
How a ready-made frame is put together
Open the back of any standard frame and you will find the same stack of parts.

- Frame. The outer molding. Its inner lip, the rabbet, holds everything in.
- Glazing. Glass or clear acrylic sheet that keeps dust off.
- Mat. A card border with a window cut in it. It separates the work from the glazing and gives it visual space.
- Artwork. Usually fixed to a backing sheet, not to the mat.
- Backing board. The rigid panel held in by tabs or clips.
Choose the frame and the mat proportions
For small handmade work, a thin, plain frame in black, white or pale wood rarely competes with the piece. Choose the frame by its opening size and by its depth, which matters as soon as the work is not flat.
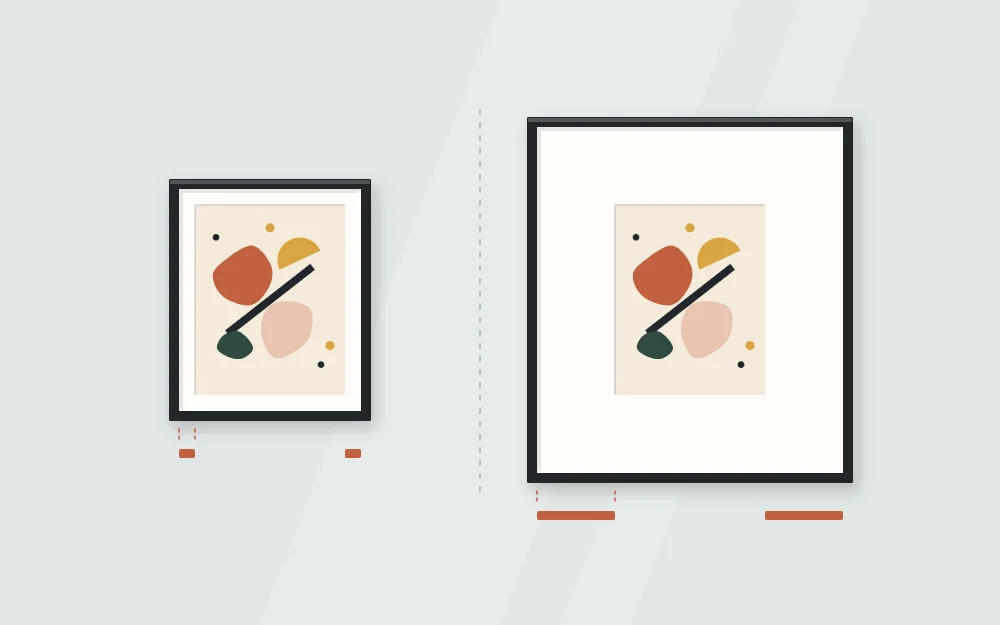
The mat does most of the work. A narrow border makes a small piece look squeezed; a generous one makes it look chosen. As a starting point, try a border of 2 to 3 in (5 to 7.5 cm) around a piece that is roughly 4 x 6 in (10 x 15 cm), and widen it if the piece still looks crowded. Many people leave the bottom border slightly deeper than the top, which stops the work appearing to slide down.
| Artwork size | Frame opening to try | Resulting border |
|---|---|---|
| 4 x 6 in (10 x 15 cm) | 8 x 10 in (20 x 25 cm) | About 2 in (5 cm) |
| 5 x 7 in (13 x 18 cm) | 11 x 14 in (28 x 36 cm) | About 3 in (7.5 cm) |
| 8 x 8 in (20 x 20 cm) | 12 x 12 in (30 x 30 cm) | About 2 in (5 cm) |
These pairings are suggestions to adjust by eye. Before you buy, check how the framed size sits in its spot using the guide to measuring a wall for art.
Cut a backing sheet
A backing sheet is a piece of heavy paper or thin card, around 200 to 300 gsm, cut to the frame’s opening size. The artwork is mounted on it, and it fills the mat window with a clean, even color.
- Take out the frame’s backing board and trace around it on the sheet.
- Cut along the line with a craft knife and metal ruler on a cutting mat, cutting away from your holding hand.
- Lay the mat on the sheet and lightly pencil the window corners, so you know exactly where the visible area is.
Mount paper pieces
Paper swells and shrinks with humidity. If it is glued down all over, it has nowhere to go and it buckles. Two light methods avoid that.
Hinges along the top
Position the work inside the pencil marks. Lift the top edge and fix two short pieces of paper tape, sticky side up, under the top corners so half of each tab shows above the work. Cross each tab with a second strip pressed onto the backing sheet. The piece now hangs from its top edge and can move slightly.
Dots of glue
For cut shapes and collage elements, a small dot of PVA glue or a dab of glue stick at the center of each shape is enough. Leave the edges free. They will lift a fraction and cast a fine shadow, which is part of the charm.
Tip
Before closing the frame, clean the inside of the glazing and check the mat for specks. A single hair behind the glass is all you will see afterward.
Mount fabric pieces
Fabric needs tension, not glue on its face. Press it first, then choose one of two approaches.
- Wrapped. Cut a piece of card slightly smaller than the frame opening. Center the fabric over it, fold the edges to the back and tape them down, pulling gently from opposite sides so the weave stays straight. The wrapped card fills the whole window.
- Floated. For a small square with a frayed or stitched edge, fix it to the backing sheet with a few tiny stitches through the card at the corners, or small dots of fabric glue placed well inside the edge.
Round fabric pieces are often better left unframed in a hoop; see the guide to fabric wall art in embroidery hoops.
Give raised work some depth
Layered paper, folded shapes and stitched pieces get crushed if the glazing presses on them. Measure the highest point of the work, then make sure the space between backing and glazing is a little greater than that.
- A shadow-box frame has a deep rabbet and often an inner spacer built in. It is the simplest answer for anything raised more than a few millimeters.
- In a standard frame, a double mat or strips of foam board glued behind the mat, out of sight, add a small gap.
Keep a set consistent
Three small pieces in matching frames read as one larger work. Hold these constant across the set:
- The same frame style, color and size
- The same mat color and border widths
- The same position of the work within the window
- One shared palette, even when the materials differ
Make a paper template of the mat window and use it to position every piece, so each sits at the same height.
Close the frame and hang it
Stack the layers in order, press the tabs down evenly and check the front once more before sealing.
Glass frames are heavier than they look. Weigh the finished frame, identify the wall material, and choose a hook, nail or other hanger its manufacturer rates for that weight and wall type, following the package instructions. The guide to hanging lightweight wall art walks through the process. For a valuable piece or a wall you are unsure of, ask a professional, and in a rental check with the landlord.
Frequently asked questions
Should the mat be white or colored?
White, off-white or cream suits nearly everything and keeps attention on the work. A colored mat can look good when it picks up a quiet tone from the piece, but strong colors tend to dominate small artwork. If you are framing a set, use one mat color for all of them.
Can I frame a piece without a mat?
Yes. Flat work that fills the frame edge to edge can go straight against the backing, though it will touch the glazing. Raised or delicate pieces benefit from a mat or hidden spacers, which hold the glazing away from the surface and prevent it flattening the work.
Why did my paper artwork ripple inside the frame?
Rippling usually happens when paper is glued or taped on all sides and cannot move as humidity changes, or when a wet glue was spread too thickly. Remount it with two hinges along the top edge only, and keep the frame away from steamy rooms and direct sun.